Snacking gets a bad reputation when it comes to weight loss, but the truth is — it doesn’t have to derail your progress. In fact, choosing the right snacks can actually speed things up. The secret? High-protein options that keep you full, fuel your muscles, and stop those late-night cravings from turning into a full-blown binge.
Protein is your best friend when you’re trying to drop pounds because it curbs hunger, stabilizes blood sugar, and supports fat loss without leaving you feeling deprived.
In this post, you’ll discover 20 guilt-free, high-protein snacks that are easy to grab, delicious, and perfect for busy days. Whether you’re looking for quick bites you can keep at your desk, post-workout refuel ideas, or healthy alternatives to chips and cookies, these snack ideas have you covered.
No boring rice cakes or bland “diet food” — just satisfying choices that make losing weight feel a whole lot easier.
Heads up! This post may contain affiliate links, which means we might earn a small commission if you make a purchase — at no extra cost to you. We only recommend snacks and products we personally love and believe will support your weight loss journey with high-protein power and zero guilt!
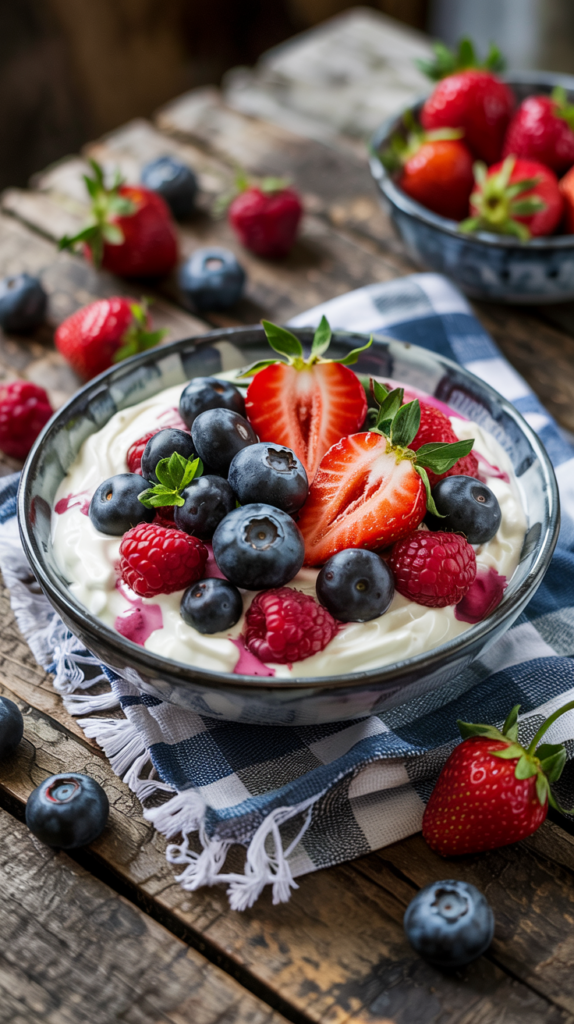
1. Greek Yogurt with Berries
Why it’s great:
Greek yogurt is one of the easiest and most versatile high-protein foods you can add to your holiday menu.
It’s thicker, creamier, and packs nearly double the protein of regular yogurt, making it a perfect choice for keeping you full and energized during busy holiday gatherings.
Pairing it with fresh or frozen berries not only adds natural sweetness but also a boost of antioxidants, vitamins, and fiber to keep digestion smooth.
Nutritional Benefits:
- Protein Power: About 10–15g per serving (1 cup).
- Gut Health: Contains probiotics for better digestion.
- Balanced Sweetness: Berries provide natural sugars without a blood sugar spike.
- Immunity Support: Antioxidants in blueberries, strawberries, and raspberries help fight inflammation.
Festive Twist Ideas:
- Layer Greek yogurt with cranberries, pomegranate seeds, or raspberries for a holiday-colored parfait.
- Sprinkle with granola, chopped nuts, or dark chocolate shavings for added crunch.
- Drizzle a little honey or maple syrup to balance tartness.
- Serve in small glasses or mason jars for a holiday dessert alternative.
How to Make It (Quick Recipe):
- Scoop 1 cup of plain Greek yogurt into a bowl or glass.
- Add a handful of mixed berries (fresh or thawed).
- Top with 1–2 tbsp of granola or crushed almonds.
- Optional: drizzle with 1 tsp honey or a sprinkle of cinnamon for warmth.
This makes a great holiday breakfast, snack, or even a light dessert, keeping you satisfied without the extra holiday guilt.
Tip: Choose unsweetened Greek yogurt and add fresh berries. High-protein yogurt snacks are perfect for weight loss diets.
2. Hard-Boiled Eggs

Why it’s great:
Hard-boiled eggs are one of the most convenient, affordable, and protein-packed foods you can enjoy during the holidays—or any time of year.
Each egg contains about 6 grams of protein and essential nutrients like vitamin B12, selenium, and choline, which support brain function, metabolism, and overall energy.
They’re naturally portion-controlled, easy to prepare in batches, and versatile enough to be served as snacks, appetizers, or salad toppings.
Nutritional Benefits:
- High-quality protein: Supports muscle repair and satiety.
- Rich in choline: Essential for brain and nervous system health.
- Low-calorie, nutrient-dense: Just about 70 calories per egg.
- Holiday-friendly: Works as a simple snack or festive appetizer base.
Festive Twist Ideas:
- Slice hard-boiled eggs in half and top with avocado mash and a sprinkle of paprika for a seasonal spin.
- Make deviled eggs with Greek yogurt instead of mayo for a lighter holiday appetizer.
- Serve them with a sprinkle of everything bagel seasoning for a trendy, flavorful bite.
- Pair with roasted veggies or whole-grain crackers for a balanced mini-meal.
How to Make Perfect Hard-Boiled Eggs (Quick Recipe):
- Place eggs in a pot of cold water, covering them by 1 inch.
- Bring to a boil, then reduce to a gentle simmer for 9–12 minutes (depending on desired firmness).
- Transfer eggs immediately into a bowl of ice water to stop cooking.
- Peel and enjoy plain, seasoned with salt and pepper, or dressed up with holiday toppings.
With their simplicity and versatility, hard-boiled eggs are a must-have on your high-protein holiday menu. They’re the perfect grab-and-go snack for busy days or a festive dish for gatherings.
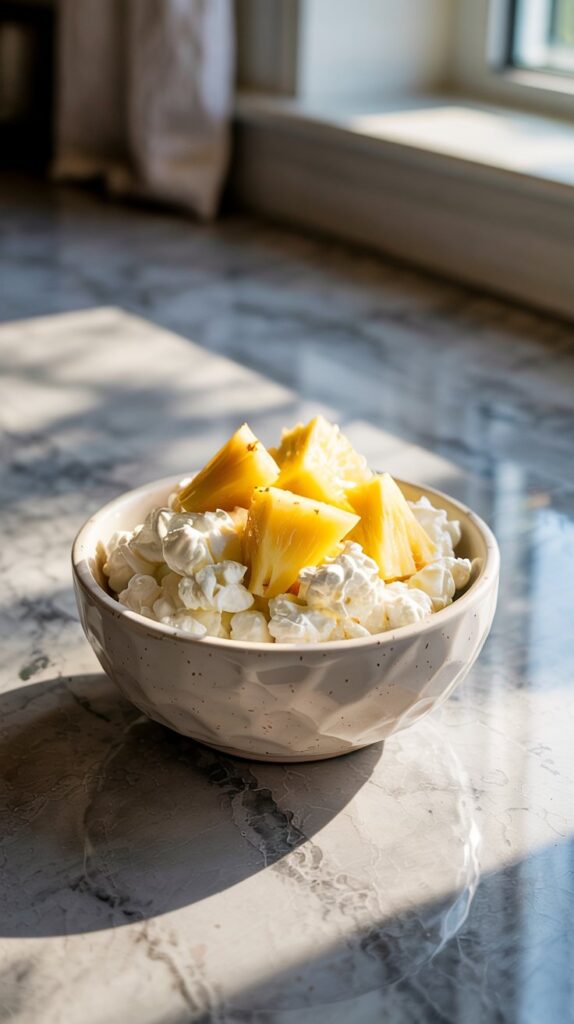
3. Cottage Cheese and Pineapple
Why it’s great:
Cottage cheese is a classic high-protein, low-fat dairy food that’s creamy, filling, and incredibly versatile.
Just one cup can provide 25+ grams of protein, making it a powerhouse for muscle repair and satiety.
Pairing it with pineapple adds natural sweetness, vitamin C, and digestive enzymes that make this combo refreshing and digestion-friendly—perfect for balancing out heavy holiday meals.
Nutritional Benefits:
- Protein-packed: Builds lean muscle and keeps you full longer.
- Calcium-rich: Supports bone health and metabolism.
- Vitamin C boost: Pineapple helps strengthen immunity during cold-weather months.
- Digestive support: Bromelain in pineapple aids digestion, reducing bloating after big meals.
Festive Twist Ideas:
- Serve cottage cheese in small cups or mason jars layered with pineapple chunks, cranberries, or pomegranate seeds for a holiday-colored treat.
- Top with toasted coconut flakes or chopped walnuts for extra crunch.
- Add a drizzle of honey or maple syrup for a dessert-like flavor without the guilt.
- Use as a light side dish alongside heavier holiday entrees to balance the meal.
How to Make It (Quick Recipe):
- Scoop ½ to 1 cup of cottage cheese into a bowl or cup.
- Add ½ cup of fresh pineapple chunks (or use canned in juice, drained).
- Sprinkle with nuts, seeds, or granola for texture.
- Optional: finish with a dash of cinnamon or nutmeg for holiday warmth.
This combo works as a quick breakfast, midday snack, or a light dessert alternative. It’s festive, refreshing, and packed with nutrients—exactly what you need to stay balanced during the holidays.
Whether you’re training hard, managing stress, or just looking for better recovery and rest — Mg Plus Protein is a smart daily addition to your wellness routine.
Click here to shop Mg Plus Protein on HerbsPro
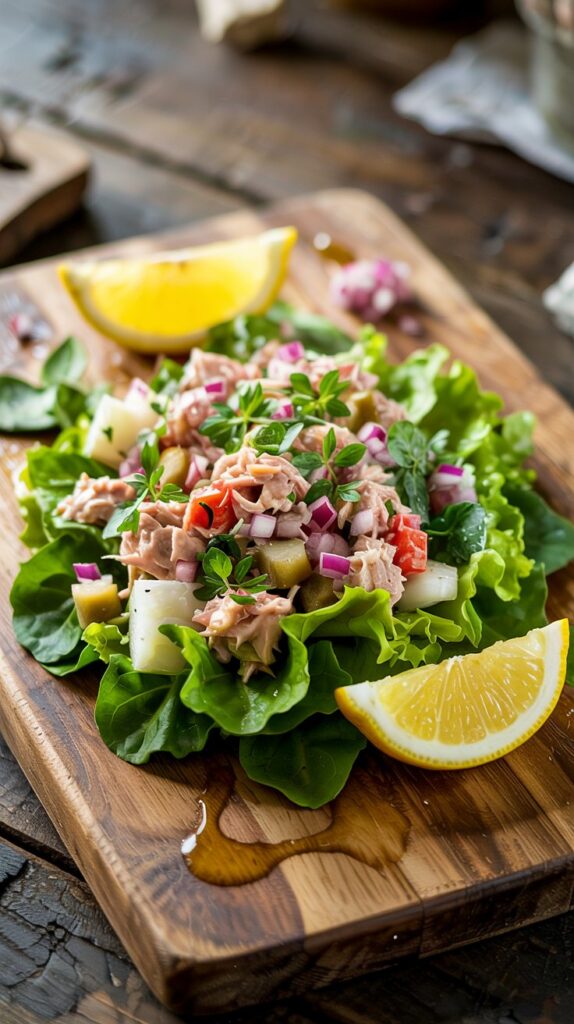
4. Tuna Salad Lettuce Wraps
Why it’s great:
Tuna is one of the leanest and most protein-rich foods you can add to your diet, with a single serving offering around 20–25 grams of high-quality protein.
It’s also packed with omega-3 fatty acids that support heart health, reduce inflammation, and keep you feeling satisfied.
When paired with crisp lettuce leaves instead of bread, you get a low-carb, refreshing, and festive snack that won’t weigh you down during the holiday season.
Nutritional Benefits:
- High-protein, low-carb: Great for fat loss and muscle maintenance.
- Omega-3 rich: Supports brain and heart health.
- Light & fresh: Perfect balance to heavier holiday foods.
- Gluten-free & low-calorie: A healthy alternative to bread-based snacks.
Festive Twist Ideas:
- Mix tuna with Greek yogurt or mashed avocado instead of mayo for a lighter, creamier filling.
- Add holiday flair with diced cranberries, celery, and a dash of Dijon mustard for a sweet-savory balance.
- Use butter lettuce or romaine leaves for crispness and easy hand-held bites.
- Top with pomegranate seeds or chopped pecans for crunch and a seasonal touch.
How to Make It (Quick Recipe):
- Drain 1 can of tuna (in water for a lighter option).
- Mix with 2 tbsp Greek yogurt or light mayo, a squeeze of lemon juice, salt, and pepper.
- Add chopped celery, red onion, or cranberries for flavor and crunch.
- Spoon the tuna mixture into large lettuce leaves (romaine, butter, or iceberg work best).
- Optional: garnish with fresh parsley or a sprinkle of paprika.
These wraps make a perfect holiday appetizer, snack, or light meal when you’re craving something protein-packed but don’t want the heaviness of bread or pastries. They’re fresh, flavorful, and easy to prepare in big batches for parties.
Why You Should Consider
Nutricology Natural Glandular Pancreas (Pork) – 720 Veggie Caps
If you’re experiencing digestive issues, nutrient malabsorption, or have been told you may have low pancreatic enzyme function, this supplement is a targeted, practitioner-trusted solution.
This is not your average digestive support — it’s a glandular extract designed to nourish and support the exocrine function of the pancreas — the part responsible for making digestive enzymes.
Whether you’re on a gut-healing journey, following an AIP, SCD, or low FODMAP diet, or just want to improve your digestive efficiency,
Nutricology’s Pancreas Glandular is a trusted, professional-grade option.
👉 Click here to shop Pancreas Glandular on HerbsPro
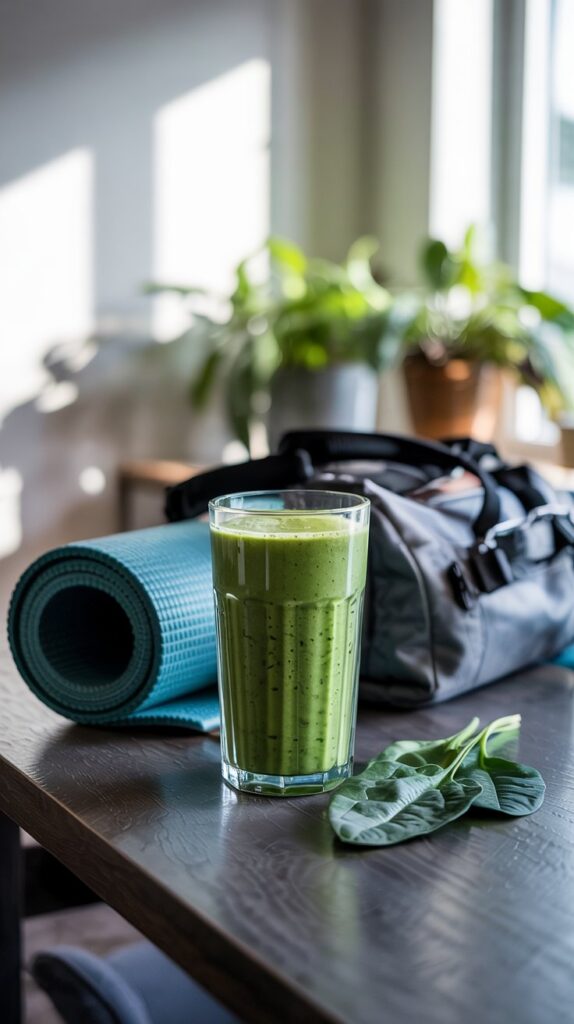
5. Protein Smoothies
Why it’s great:
Protein smoothies are one of the quickest and most versatile ways to boost your protein intake—especially when you’re busy with holiday prep and parties.
They can be customized with seasonal flavors, loaded with nutrients, and enjoyed as a snack, breakfast, or even a light dessert.
Depending on your protein source, a single smoothie can pack 20–30 grams of protein, keeping you satisfied and fueled through long holiday days.
Nutritional Benefits:
- High-protein boost: Supports muscle recovery and appetite control.
- Customizable: Add fruits, greens, seeds, or nut butters for extra nutrition.
- Hydrating & energizing: Great for mornings or post-workout fuel.
- Holiday-friendly: Easy to make festive with seasonal flavors.
Festive Twist Ideas:
- Peppermint Mocha Smoothie: Blend chocolate protein powder, almond milk, banana, and a drop of peppermint extract for a holiday treat.
- Pumpkin Pie Smoothie: Use vanilla protein powder, pumpkin puree, almond milk, cinnamon, and nutmeg.
- Cranberry Orange Smoothie: Blend cranberries, orange juice, Greek yogurt, and vanilla protein for a refreshing seasonal flavor.
- Eggnog Protein Smoothie: Add a scoop of vanilla protein powder to almond milk, nutmeg, and cinnamon for a healthier eggnog alternative.
How to Make It (Quick Recipe):
- Add 1 scoop of protein powder (whey, pea, or plant-based) to a blender.
- Pour in 1–1 ½ cups of liquid (almond milk, oat milk, or water).
- Add 1 banana or frozen berries for creaminess and natural sweetness.
- Toss in a handful of spinach or kale (optional for extra nutrients).
- Blend until smooth, then top with chia seeds, flaxseeds, or cinnamon.
Protein smoothies are a holiday lifesaver—they’re quick, customizable, and can taste like dessert while keeping you on track with your health goals.
6. Almond Butter on Rice Cakes
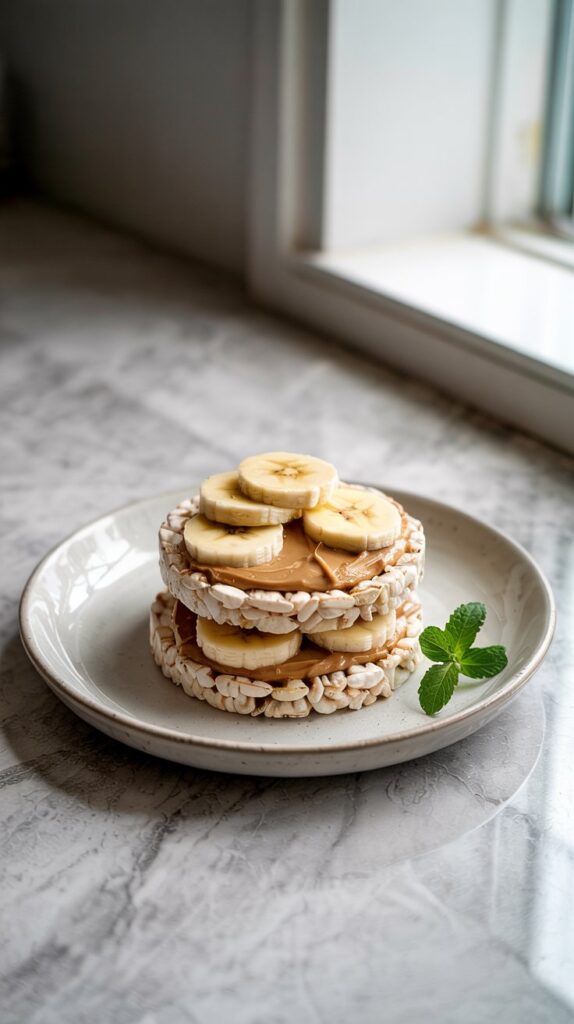
Why it’s great:
Sometimes the simplest snacks are the most satisfying—and almond butter on rice cakes is the perfect example.
This combo delivers a balance of plant-based protein, healthy fats, and complex carbs, making it a quick, energizing option during the holidays.
Rice cakes provide a light, crunchy base, while almond butter adds creaminess, protein, and heart-healthy monounsaturated fats that keep you full longer.
Nutritional Benefits:
- Protein & healthy fats: Almond butter has about 7g of protein per 2 tablespoons.
- Energizing carbs: Rice cakes provide quick fuel without weighing you down.
- Rich in vitamin E & magnesium: Supports skin health and energy levels.
- Satisfying & portion-controlled: A smart swap for sugary or fried snacks.
Festive Twist Ideas:
- Top with sliced bananas, strawberries, or apples for natural sweetness.
- Sprinkle with cinnamon, nutmeg, or pumpkin spice for holiday flavors.
- Add a drizzle of dark chocolate or a few cacao nibs for a festive treat.
- Use cranberries or pomegranate seeds for a seasonal pop of color.
How to Make It (Quick Recipe):
- Take 1–2 whole-grain rice cakes (or brown rice cakes for extra fiber).
- Spread with 1–2 tablespoons of almond butter.
- Add your toppings: banana slices, chia seeds, or a dusting of cinnamon.
- Serve as a quick snack, light breakfast, or even a healthier dessert option.
This snack is not only quick and easy to assemble, but also holiday-friendly—you can dress it up with seasonal toppings to make it feel festive while still being wholesome.
Want to snack smarter and lose weight without guilt? These top-rated high-protein snacks are delicious, filling, and trusted by real people who’ve made the switch.
➡️ Explore the Top-Rated Snacks on Amazon Now
7. Beef or Turkey Jerky (Low-Sodium)
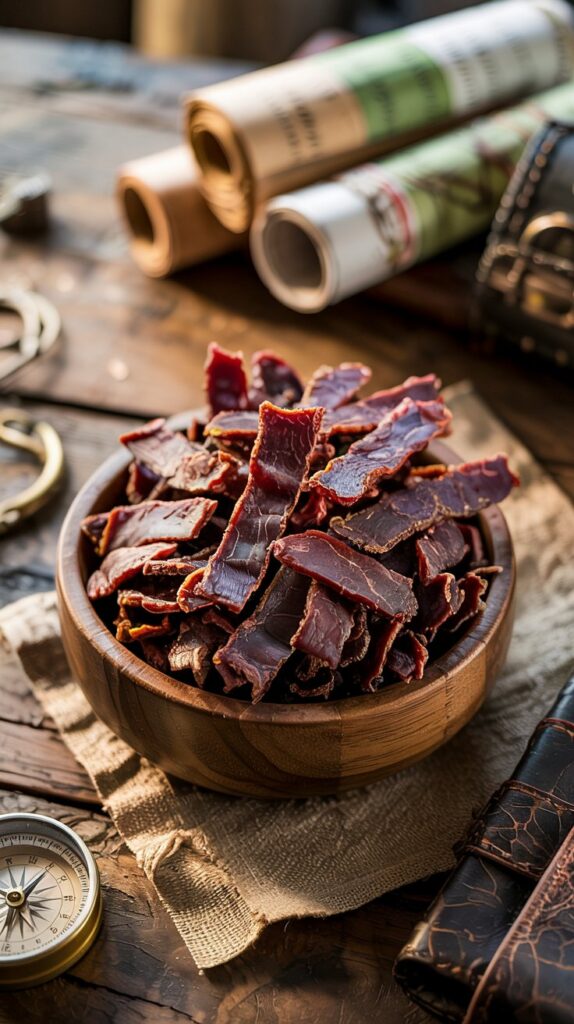
Beef or turkey jerky is one of the most convenient high-protein snacks you can keep on hand, especially when you’re busy, traveling, or just need something quick between meals.
The drying and curing process makes jerky lightweight, portable, and long-lasting, while still packing in a concentrated amount of protein to support muscle repair and satiety.
The key is choosing low-sodium and minimally processed options. Many store-bought jerkies are loaded with salt, preservatives, and added sugars, which can turn a healthy snack into something less beneficial.
Opt for brands that use lean cuts of beef or turkey, natural seasonings, and fewer additives. If you want full control, you can even make homemade jerky using a dehydrator or oven, which lets you flavor it to your liking while keeping it clean and simple.
Nutritionally, jerky provides about 9–12 grams of protein per serving, with little to no carbs, making it ideal for low-carb, keto, or high-protein diets.
It also helps curb cravings since the chewiness keeps you satisfied longer compared to lighter snacks like chips or crackers.
Quick Tip: Pair your jerky with a piece of fruit or raw veggies to balance out the saltiness and add fiber, which helps with digestion and keeps you fuller for longer.
How to Make Low-Sodium Jerky at Home
Ingredients:
- 1 lb lean beef or turkey breast (thinly sliced against the grain)
- ¼ cup low-sodium soy sauce or coconut aminos
- 1 tbsp apple cider vinegar or Worcestershire sauce
- 1 tsp garlic powder
- 1 tsp onion powder
- ½ tsp smoked paprika (for a smoky kick)
- Black pepper to taste
- (Optional) 1 tsp honey or maple syrup for a touch of sweetness
Steps:
- Slice the meat thinly: Freeze it for 30 minutes first — this makes it easier to cut into even slices.
- Marinate: Mix all ingredients in a bowl, add the sliced meat, and let it marinate for at least 4 hours (overnight works best).
- Preheat oven or dehydrator: Set to 160°F (70°C).
- Arrange the strips: Place them on a wire rack lined with foil (for easy cleanup) without overlapping.
- Dry the meat: Bake or dehydrate for 3–4 hours, flipping halfway, until the jerky is dry but still slightly chewy.
- Cool and store: Let it cool fully before storing in an airtight container. Homemade jerky can last about 1–2 weeks at room temperature, longer if refrigerated.
Now you’ve got a clean, protein-rich snack without the excess sodium or additives from store-bought versions.
Delicious, Low-Sugar, High-Protein Snack – Grab Your 12-Pack Today!” https://amzn.to/4p70Qur
8. Edamame
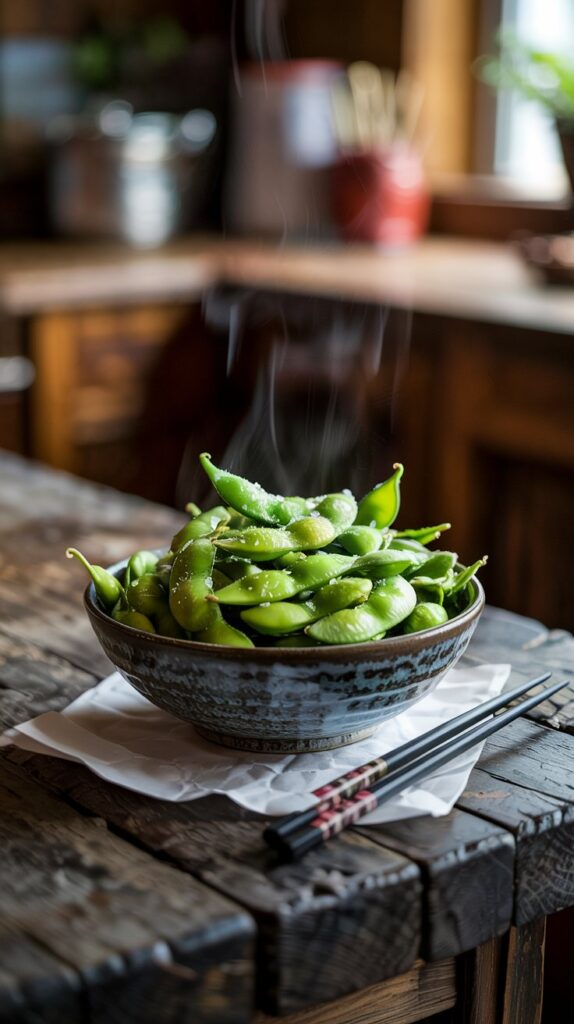
Edamame (young soybeans in the pod) is one of the easiest and healthiest high-protein snacks you can enjoy.
It’s naturally gluten-free, rich in plant-based protein, and loaded with fiber, vitamins, and minerals like folate, iron, and magnesium.
A single cup of edamame can give you 15–17 grams of protein, making it a fantastic snack for vegetarians, vegans, or anyone looking to boost their protein intake.
What makes edamame so great is its simplicity — it’s satisfying, slightly nutty in flavor, and the act of popping beans out of their pods makes snacking more mindful and fun.
It’s also low in calories but high in satiety, which means it keeps you fuller for longer without weighing you down.
Quick Tip: Pair edamame with a sprinkle of sea salt or chili flakes if you like a little kick, or toss it with garlic powder for extra flavor.
How to Make Edamame at Home
Ingredients:
- 2 cups frozen edamame in pods (found in most grocery freezer sections)
- 1–2 tsp sea salt (or low-sodium salt if preferred)
- Optional flavorings: garlic powder, chili flakes, sesame seeds, or a drizzle of soy sauce
Steps:
- Boil water: Bring a pot of water to a boil and add a pinch of salt.
- Cook the edamame: Add frozen edamame pods and cook for 4–5 minutes until tender but still slightly firm.
- Drain and season: Drain the pods well, then sprinkle with sea salt or your favorite seasonings while still warm.
- Serve: Eat by squeezing the beans out of the pod with your teeth and discard the shells (they’re not edible).
For a different twist, you can roast shelled edamame in the oven at 400°F (200°C) for 20 minutes with olive oil, salt, and spices to make a crispy high-protein snack.

9. Deviled Avocado Eggs
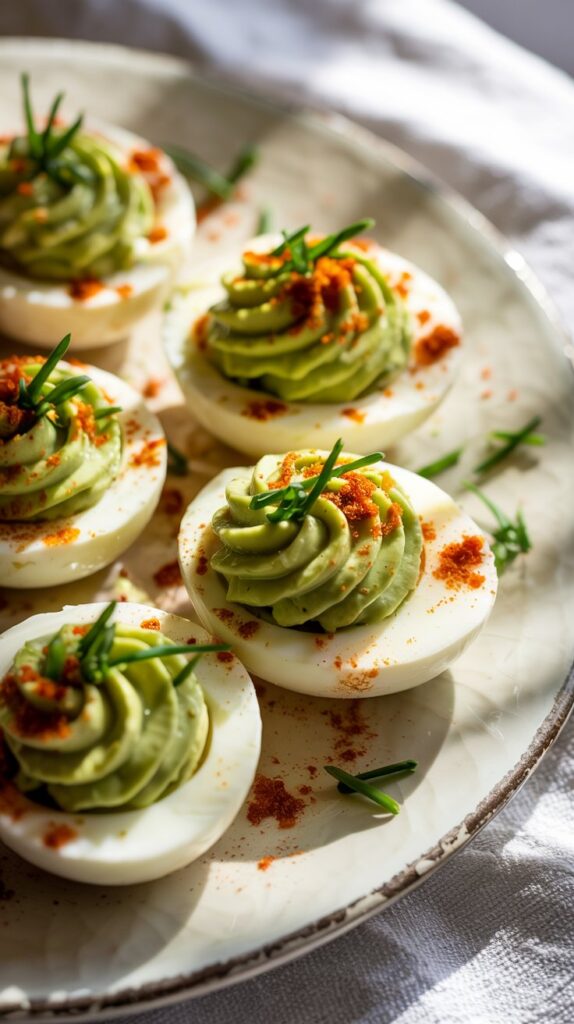
If you love classic deviled eggs but want a fresher, healthier spin, deviled avocado eggs are the way to go.
Instead of using mayonnaise, this recipe blends creamy avocado with the yolks, giving you a vibrant green filling that’s not just beautiful but also packed with nutrition.
You’re essentially combining two powerhouse foods — eggs and avocados — into one protein-rich, healthy-fat-loaded snack.
Eggs are already a great high-protein option, delivering about 6 grams of protein per egg along with essential vitamins like B12 and choline, which support energy and brain health.
When you add avocado, you bring in heart-healthy monounsaturated fats, potassium (even more than bananas!), and antioxidants like lutein that benefit your eyes and skin.
This makes deviled avocado eggs not just a tasty snack but a smart one that fuels your body and satisfies your hunger.
The flavor is also elevated compared to traditional deviled eggs — avocado adds a creamy, buttery texture with a mild nuttiness, while lemon or lime juice brightens the taste and keeps the mixture from browning.
You can make them simple with just a few ingredients or dress them up with spices, herbs, or even a dash of hot sauce for extra flavor.
Because they’re portable, nutrient-dense, and filling without being heavy, these eggs are perfect for:
- A midday protein boost
- A post-workout recovery snack
- A low-carb party appetizer
- A meal-prep option you can enjoy throughout the week
Quick Tip: If you want to keep them looking extra fresh for a gathering, assemble them just before serving, or store the filling and egg whites separately until ready.
How to Make Deviled Avocado Eggs
Ingredients (makes 12 halves):
- 6 large hard-boiled eggs, peeled
- 1 ripe avocado
- 1–2 tsp lime or lemon juice (to prevent browning & add freshness)
- 1 clove garlic, finely minced or ¼ tsp garlic powder (optional)
- 1–2 tbsp plain Greek yogurt (optional, adds creaminess & extra protein)
- Salt and black pepper, to taste
- Garnish: smoked paprika, chili flakes, chopped chives, or sesame seeds
Step-by-Step Instructions:
- Boil & prep the eggs
- Place eggs in a pot, cover with water, and bring to a gentle boil. Once boiling, cook for about 10 minutes.
- Transfer to an ice bath immediately to stop cooking and make peeling easier. Peel once cooled.
- Slice & separate
- Cut the hard-boiled eggs in half lengthwise.
- Carefully remove the yolks and place them in a mixing bowl. Set the whites aside on a serving plate.
- Make the filling
- Add the ripe avocado to the bowl with yolks. Mash together until smooth.
- Stir in lime or lemon juice, garlic, Greek yogurt (if using), and season with salt and pepper. Taste and adjust seasoning.
- Fill the eggs
- Spoon or pipe the mixture into the egg white halves. For a polished look, use a piping bag or a zip-top bag with the corner snipped off.
- Garnish & serve
- Top with smoked paprika, chili flakes for heat, or fresh herbs like chives for extra flavor and color.
Storage Tip: Keep in an airtight container in the fridge. If preparing ahead, store the filling separately and pipe it into the eggs just before serving to avoid discoloration from the avocado.
These deviled avocado eggs strike the perfect balance between indulgence and nutrition. They’re creamy, satisfying, and festive enough for a holiday spread but simple enough to whip up as a weekday snack.
10. Chia Seed Pudding
Chia seed pudding has become a superstar in the world of healthy snacks, and for good reason. It’s creamy, filling, and incredibly versatile — you can make it sweet, fruity, chocolatey, or even spiced depending on your mood.
The magic of this pudding comes from chia seeds’ unique ability to absorb liquid and form a gel-like texture, turning a simple mixture of seeds and milk into a rich, satisfying dish.
Nutritionally, chia seeds are tiny but mighty. Just two tablespoons pack around 4–5 grams of protein, 10 grams of fiber, and are loaded with omega-3 fatty acids, calcium, magnesium, and antioxidants.
The combination of protein, healthy fats, and fiber makes chia seed pudding an excellent choice for steady energy, digestion support, and keeping cravings at bay.
Unlike sugary store-bought puddings, this version is naturally wholesome, customizable, and can easily fit into any diet — whether you’re vegan, gluten-free, or following a low-carb plan.
You can prepare it in just a few minutes and let it set overnight, making it perfect for meal prep, on-the-go breakfasts, or an afternoon snack that actually fuels your body.
Quick Tip: Because chia seeds are so absorbent, the pudding thickens as it rests. If it feels too thick the next morning, simply stir in a splash more milk until you get the consistency you like.
How to Make Chia Seed Pudding
Ingredients (2 servings):
- ½ cup chia seeds
- 2 cups milk of choice (almond, coconut, soy, or dairy)
- 1–2 tbsp honey, maple syrup, or agave (optional, for sweetness)
- 1 tsp vanilla extract
- Pinch of cinnamon (optional, for warmth)
Optional Toppings:
- Fresh fruit (berries, banana slices, mango chunks)
- Nuts or seeds (almonds, walnuts, pumpkin seeds)
- Granola for crunch
- Dark chocolate shavings or cacao nibs
- A dollop of Greek yogurt for extra protein
Step-by-Step Instructions:
- Mix the base
- In a bowl or mason jar, whisk together chia seeds, milk, sweetener, vanilla, and cinnamon until well combined.
- Let it rest
- Cover and refrigerate for at least 2 hours, but overnight works best. Stir once after 15 minutes to prevent clumping.
- Check consistency
- By morning, the chia seeds will have absorbed the liquid, creating a pudding-like texture. If it’s too thick, stir in a little extra milk.
- Add toppings
- Layer your pudding with fruit, granola, or nuts for added texture and flavor. This turns it from a simple snack into a satisfying, nutrient-packed treat.
Meal Prep Tip: Make multiple jars at once so you have a grab-and-go snack or breakfast ready all week. It’s an easy way to stay on track with healthy eating.
Whether you enjoy it plain with just a drizzle of honey or layered into a parfait with fruit and granola, chia seed pudding is one of the most convenient, protein-friendly snacks you can keep in your rotation.
Nutricost Isolate Whey Protein Powder, Vanilla, 5 pounds
11. Roasted Chickpeas
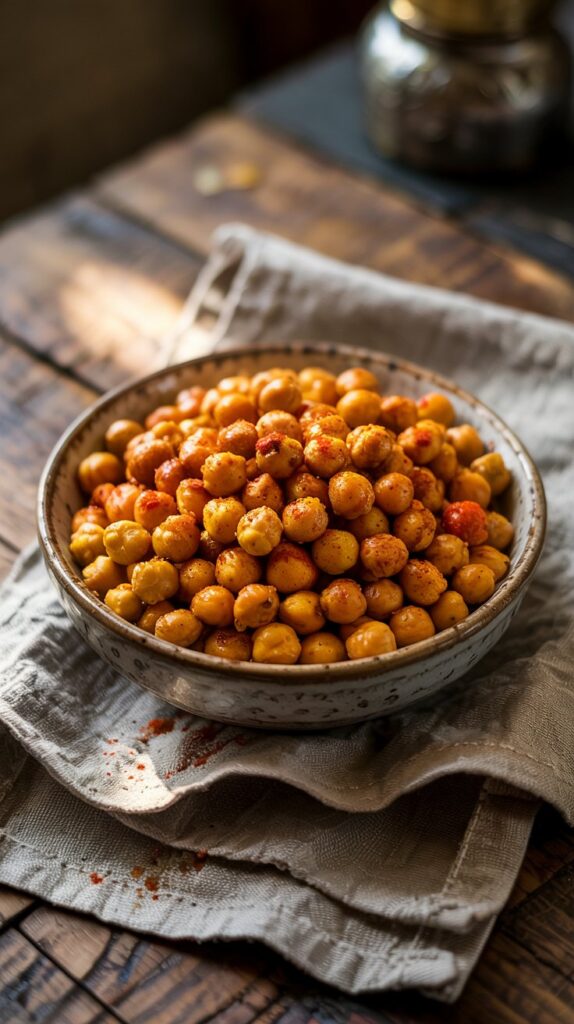
Roasted chickpeas are the ultimate crunchy, high-protein snack you can make at home. They’re budget-friendly, easy to prepare, and far healthier than chips or processed snack foods.
With about 6 grams of protein and 5 grams of fiber per half-cup, chickpeas give you a satisfying, nutrient-packed crunch that actually keeps you full instead of leaving you hungry an hour later.
One of the best things about roasted chickpeas is how customizable they are. You can make them savory with spices like garlic, paprika, and cumin, or go sweet with cinnamon and a drizzle of maple syrup.
They also store well, so you can roast a big batch at the start of the week and have a healthy, portable snack ready to go whenever you need it.
Nutritionally, chickpeas are a plant-based protein powerhouse. They provide iron, magnesium, folate, and slow-digesting carbs that keep your energy steady throughout the day.
Plus, the fiber supports gut health and digestion, making this snack both tasty and functional.
Quick Tip: For maximum crunch, make sure you dry your chickpeas thoroughly before roasting. Moisture is the enemy of crispiness!
How to Make Roasted Chickpeas
Ingredients (about 2–3 servings):
- 1 can (15 oz) chickpeas, drained and rinsed
- 1–2 tbsp olive oil
- 1 tsp garlic powder
- 1 tsp smoked paprika (or chili powder for heat)
- ½ tsp cumin (optional, adds a warm, earthy flavor)
- ½ tsp salt
- ¼ tsp black pepper
Optional Sweet Version:
- 1 tbsp maple syrup or honey
- 1 tsp cinnamon
- Pinch of nutmeg
Step-by-Step Instructions:
- Prep the chickpeas
- Drain and rinse chickpeas thoroughly. Spread them on a clean kitchen towel and pat completely dry. Remove loose skins if you want extra crispiness.
- Season
- Transfer chickpeas to a bowl, drizzle with olive oil, and toss with your seasonings of choice (savory or sweet). Coat evenly.
- Roast
- Spread chickpeas in a single layer on a baking sheet lined with parchment paper.
- Roast at 400°F (200°C) for 25–35 minutes, shaking the pan halfway through. Chickpeas should be golden brown and crispy.
- Cool & store
- Let them cool completely before storing in an airtight container at room temperature. This helps them stay crunchy.
Storage Tip: Best enjoyed within 3 days — they lose crunch if stored too long. To re-crisp, pop them back in the oven for 5 minutes.
Roasted chickpeas are one of those snacks you can easily tailor to your taste and mood. They’re crunchy, flavorful, protein-rich, and way more satisfying than grabbing a bag of chips..
12. Cottage Cheese and Almonds

When it comes to quick and powerful high-protein snacks, cottage cheese paired with almonds is a winning combination.
It’s not only delicious but also nutrient-dense, giving you the perfect balance of protein, healthy fats, and slow-digesting fuel to keep you energized.
This snack is especially popular among athletes, bodybuilders, and anyone focused on weight loss or lean muscle growth.
Unlike many packaged snacks that are high in refined carbs and empty calories, cottage cheese and almonds work together to give your body what it needs: sustained energy, muscle repair, and appetite control.
Whether you’re looking for a post-workout recovery option, a filling midday snack, or even something before bed, this duo fits right in.
Nutritional Benefits
Cottage Cheese:
- Packed with casein protein, which digests slowly and provides a steady release of amino acids into your bloodstream.
- Excellent source of calcium to support bone strength and muscle contraction.
- Rich in B vitamins, which help with metabolism and energy production.
- Low in calories but high in protein, making it a great choice for weight loss.
Almonds:
- Loaded with healthy monounsaturated fats that support heart health.
- Provide magnesium, which aids in muscle function, energy production, and better sleep quality.
- Contain vitamin E, a powerful antioxidant that supports skin health and recovery after workouts.
- Offer fiber and protein, which work together to keep you full longer and reduce cravings.
When combined, cottage cheese and almonds deliver a snack that’s both filling and functional.
The slow-digesting protein from cottage cheese paired with the crunch of almonds makes it not only healthy but also satisfying.
How to Make It
Making this snack takes less than two minutes. Here’s how to put it together:
- Scoop ½–1 cup of low-fat or full-fat cottage cheese into a small bowl.
- For weight loss, low-fat cottage cheese works best.
- For bulking or higher calorie needs, full-fat cottage cheese provides extra energy.
- Add 10–12 raw or roasted almonds.
- Raw almonds are the healthiest choice since they contain no added salt or oil.
- Lightly roasted almonds add more flavor but watch out for added sodium.
- Mix together and enjoy as is.
Optional Add-Ons for Flavor:
- Savory twist: Add black pepper, paprika, or chopped cucumbers.
- Sweet twist: Mix in a handful of blueberries, raspberries, or a drizzle of honey.
- Extra crunch: Sprinkle chia seeds, flaxseeds, or granola for added fiber and texture.
Pro Tips to Maximize This Snack
- Meal Prep Idea: Pre-portion almonds into small bags and keep a container of cottage cheese in your fridge so you can grab and go.
- Bedtime Snack: Eating cottage cheese before bed is popular among bodybuilders because casein protein digests slowly and feeds muscles overnight.
- Workout Fuel: If you’re having it post-workout, add some fresh fruit like pineapple or berries for a natural carb boost to replenish glycogen.
- Low-Carb Diet Friendly: If you’re on keto or a low-carb plan, stick to plain cottage cheese and raw almonds without sweeteners.
Why It Works So Well
This snack is effective because it combines protein + fat + fiber, which keeps you satisfied longer than carb-heavy snacks.
Instead of spiking your blood sugar (like chips or cookies), it provides steady energy release.
For anyone looking to build muscle, burn fat, or simply eat healthier, cottage cheese and almonds are one of the simplest yet most powerful snacks you can have on your rotation.
Best Time to Eat It:
Late-night snack for slow-digesting protein while you sleep.
Mid-morning snack to keep hunger away until lunch.
Post-workout to repair and rebuild muscle.
“Smooth, Pure, and High-Protein – Perfect for Shakes & Baking!”https://amzn.to/46uw5rd
13. Turkey or Chicken Roll-Ups
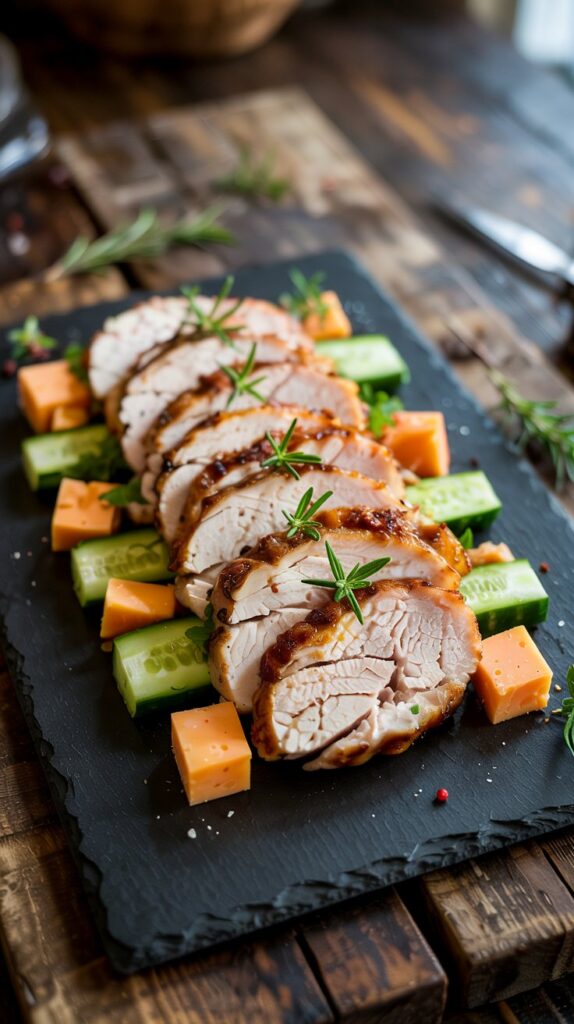
If you’re looking for a high-protein snack that feels more like a mini-meal than just a nibble, turkey or chicken roll-ups are the way to go.
They’re lean, filling, and incredibly versatile, making them one of the best options for anyone trying to stay on track with healthy eating.
Unlike chips, crackers, or sugary snacks, roll-ups give you a clean combination of lean protein + healthy fats + fresh veggies (if you add them in).
They’re also portable and quick to prepare — no stove required. With just a few ingredients, you’ll have a snack that works for weight loss, muscle growth, or even just an energy boost during a busy day.
Nutritional Benefits
Turkey or Chicken (Lean Deli Meat):
- Rich in high-quality protein, which supports muscle repair and keeps you full.
- Low in fat and calories (especially turkey breast), making it a smart option for weight loss.
- Contains selenium and B vitamins that help with energy metabolism and immunity.
Add-On Options:
- Cheese slices → add calcium, extra protein, and flavor.
- Vegetables (spinach, cucumber, bell peppers, lettuce) → add crunch, vitamins, minerals, and fiber.
- Mustard, hummus, or Greek yogurt spread → boost flavor without piling on unhealthy fats.
This makes turkey or chicken roll-ups a balanced snack that doesn’t just fill you up but also fuels your body with nutrients that matter.
How to Make Turkey or Chicken Roll-Ups
Ingredients (1 Serving):
- 2–3 slices of turkey breast or chicken breast (deli-style, low-sodium preferred)
- 1 slice of cheese (optional)
- Fresh veggies (spinach leaves, thin cucumber strips, or bell pepper slices)
- 1 teaspoon mustard, hummus, or Greek yogurt spread
Steps:
- Lay your turkey or chicken slices flat on a clean surface or plate.
- If you’re using a spread, lightly coat the meat with mustard, hummus, or Greek yogurt.
- Place a slice of cheese (optional) on top for creaminess and more protein.
- Add a few fresh veggie strips — spinach, cucumbers, or bell peppers work great.
- Roll everything up tightly into a cylinder shape.
- Slice in half (optional) and secure with a toothpick if you’re prepping for later.
That’s it — quick, easy, and satisfying!
Flavor Variations
- Low-Carb Keto Roll-Ups: Skip the cheese and just use turkey + avocado slices for extra healthy fats.
- Mexican-Style Roll-Ups: Add salsa, guacamole, and shredded lettuce inside your roll.
- Breakfast Roll-Ups: Spread Greek yogurt or cottage cheese, then add sliced boiled egg inside.
- Buffalo Roll-Ups: Add a dash of hot sauce and celery sticks for a spicy, crunchy twist.
Pro Tips for Success
- Go Low-Sodium: Choose reduced-sodium deli turkey or chicken to avoid excess salt.
- Prep Ahead: Make several roll-ups at once, store them in a container, and refrigerate for up to 24 hours. They’re perfect for office snacks or post-gym refueling.
- Protein Boost: Use thicker turkey breast slices instead of thin deli cuts for more substance.
- On-the-Go Snack: Wrap them in parchment paper or foil so you can grab them while heading out the door.
Why They Work So Well
Roll-ups are high in protein but low in carbs, making them excellent for appetite control and steady energy. Unlike crackers or granola bars, they won’t spike your blood sugar.
Instead, they give you a lean, clean source of fuel to power through workouts or long workdays.
✅ Best Time to Eat Them:
Quick low-carb option when you need something filling but light.
Post-workout snack for muscle recovery.
Midday snack to fight cravings before dinner.
Fuel Recovery & Strength with 5lbs of Premium Whey Isolate!” 👉 https://amzn.to/46uw5rd
14. Protein Bars (Clean Ingredients)
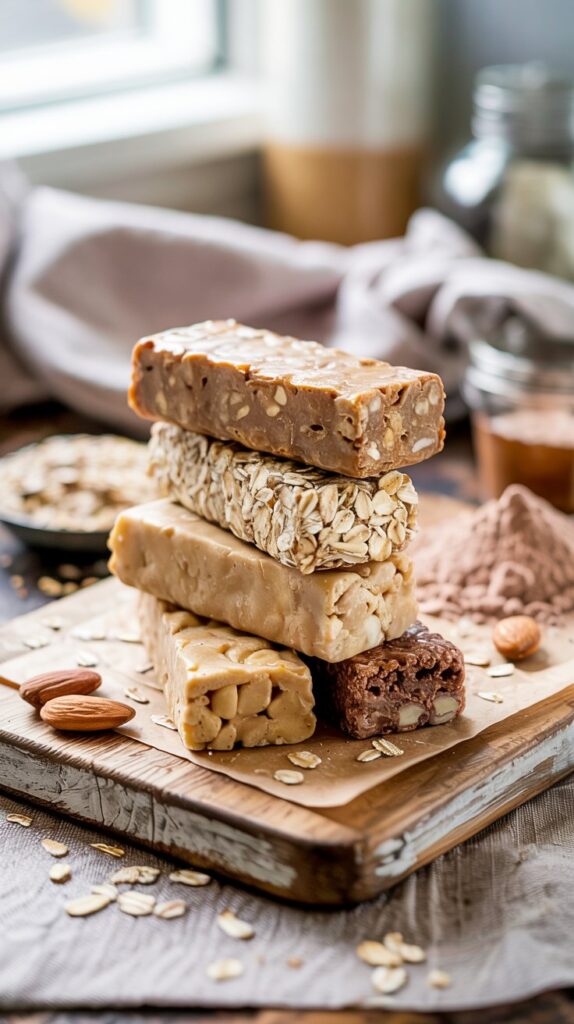
Protein bars are one of the most convenient high-protein snacks you can have in your arsenal. They’re portable, require no prep, and can be eaten anytime you need a quick boost of energy.
The problem? Not all protein bars are created equal. Many store-bought options are loaded with added sugar, artificial sweeteners, and unnecessary fillers that turn what should be a healthy snack into something closer to a candy bar.
That’s why it’s important to either choose protein bars with clean ingredients or make your own at home.
A good protein bar should provide a balance of high-quality protein, healthy fats, and fiber, without excess sugar or preservatives.
When chosen wisely, they can help with weight management, muscle recovery, and appetite control.
Nutritional Benefits
- Protein: Supports muscle repair, growth, and satiety. Look for bars with at least 10–20 grams of protein per serving.
- Fiber: Helps with digestion and keeps you feeling full longer.
- Healthy Fats: From ingredients like nuts, seeds, or coconut oil, which provide sustained energy.
- Natural Sweeteners: Options with honey, dates, or stevia are better than refined sugars or corn syrup.
Clean protein bars should feel like you’re eating real food, not a processed candy bar.
How to Choose a Clean Protein Bar
When buying protein bars at the store, check the label and aim for:
- Protein Source: Whey protein isolate, pea protein, or brown rice protein are high-quality options.
- Sugar Content: Stick to less than 8–10 grams of sugar per bar.
- Fiber Content: At least 3–5 grams of fiber to aid satiety.
- Ingredients List: Fewer is better. Look for nuts, seeds, oats, and natural binders instead of syrups and additives.
Brands like RXBAR, KIND Protein, Quest, and No Cow are often cleaner options.
How to Make Homemade Protein Bars (Clean & Healthy)
Here’s a simple recipe to try:
Ingredients (makes 6–8 bars):
- 1 cup rolled oats
- ½ cup natural peanut butter (or almond butter)
- ½ cup protein powder (whey, pea, or your favorite blend)
- 3 tablespoons honey or maple syrup
- 2 tablespoons chia seeds or flaxseeds (for fiber)
- 2 tablespoons dark chocolate chips (optional)
Steps:
- In a large bowl, combine oats, protein powder, and chia seeds.
- Add peanut butter and honey. Mix until everything sticks together.
- If it feels too dry, add 1–2 tablespoons of almond milk.
- Fold in dark chocolate chips if desired.
- Press mixture into a lined baking dish and flatten evenly.
- Refrigerate for at least 1 hour, then cut into bars.
Store in the fridge for up to a week or freeze for longer.
Flavor Variations
- Chocolate Almond: Use chocolate protein powder + almonds + cacao nibs.
- Berry Blast: Add dried cranberries or blueberries + vanilla protein.
- Coconut Crunch: Mix in shredded coconut + almond butter.
- Peanut Butter Banana: Mash a ripe banana into the mixture for natural sweetness.
Pro Tips
- If you’re using store-bought bars, always pair them with water since fiber + protein digest better with hydration.
- For weight loss, choose bars with under 250 calories.
- For bulking, go for higher-calorie bars (300–400 calories) that include oats, nut butter, and protein.
- Avoid bars with sugar alcohols if they upset your stomach.
Why Protein Bars Work as a Snack
They’re compact, nutrient-dense, and can be tailored to your goals.
Instead of skipping meals or grabbing junk food, a protein bar gives you portable fuel that balances blood sugar, reduces cravings, and supports recovery after workouts.
Best Time to Eat Protein Bars:
As a travel-friendly snack when you don’t have access to real food.
Pre-workout for quick energy.
Post-workout to replenish protein stores.
“Fuel Your Day with 20g of Protein in Every Bar – Order Your Variety Pack Now!” https://amzn.to/4p70Qur
15. Hummus and Veggies
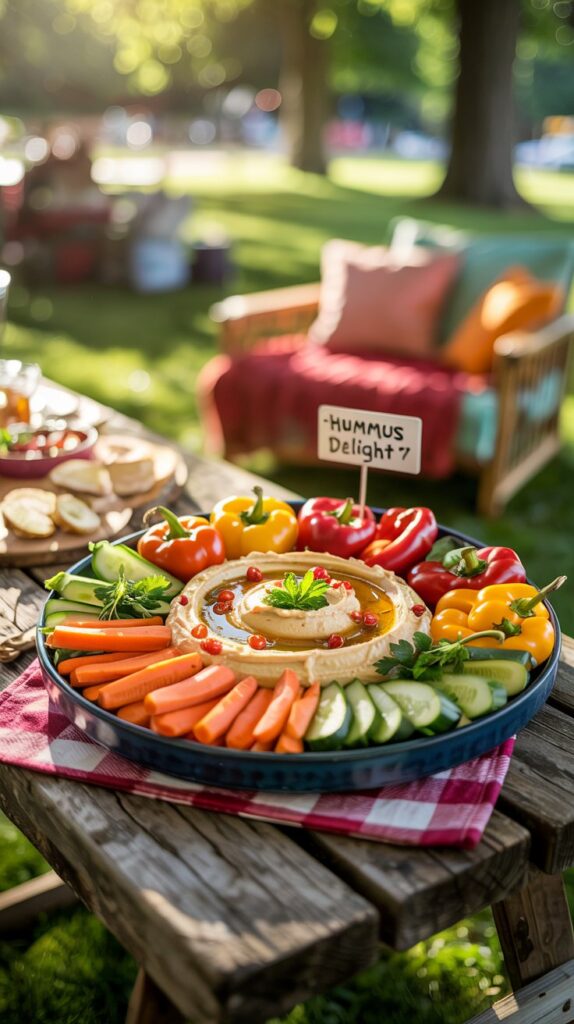
✔ Chickpea-based hummus fuels you with plant protein.
✔ Dip carrots, cucumber, or bell peppers. Hummus with veggies is a great plant-based protein snack for weight loss.
16. Low-Fat String Cheese

Hummus and veggies are a timeless, nutrient-dense snack that brings together flavor, crunch, and health benefits in one bowl.
Hummus, a creamy dip made primarily from chickpeas, is packed with plant-based protein, fiber, and healthy fats, while the colorful variety of fresh vegetables provides vitamins, minerals, and antioxidants.
Together, they make a satisfying snack that keeps you energized, helps control cravings, and supports both weight loss and muscle recovery.
This combo is also incredibly versatile. You can enjoy it as a midday energy booster, a pre-workout snack, or even a light lunch when paired with whole-grain pita.
The best part? It’s easy to prepare in bulk, store in the fridge, and grab whenever hunger strikes.
Nutritional Benefits
- Hummus (Chickpeas + Tahini): Rich in plant-based protein, iron, magnesium, and heart-healthy fats.
- Vegetables: Low in calories but high in fiber, vitamins, and minerals. Great for digestion, hydration, and satiety.
- Balanced Snack: Protein + fiber + healthy fats = stable energy and fewer cravings.
Best Veggies to Pair with Hummus
- Carrot sticks (crunchy and sweet)
- Celery sticks (refreshing and hydrating)
- Bell peppers (vitamin C boost and natural sweetness)
- Cucumber slices (light and cooling)
- Cherry tomatoes (juicy and slightly tangy)
- Broccoli or cauliflower florets (fiber-rich and filling)
- Snap peas or green beans (great crunch and natural sweetness)
Mixing different colors not only makes your snack look appealing but also ensures you’re getting a wide range of nutrients.
How to Make Classic Hummus at Home
While you can easily buy hummus at the store, making your own ensures it’s fresh, clean, and free from preservatives. Here’s a simple recipe:
Ingredients (makes 1½ cups):
- 1 can (15 oz) chickpeas, drained and rinsed
- ¼ cup tahini (sesame seed paste)
- 2 tablespoons extra-virgin olive oil
- 2 tablespoons fresh lemon juice
- 1 clove garlic, minced
- ½ teaspoon salt
- 2–3 tablespoons water (to thin, if needed)
- Pinch of paprika or cumin (optional, for extra flavor)
Steps:
- Add chickpeas, tahini, olive oil, lemon juice, garlic, and salt into a food processor.
- Blend until smooth and creamy. If too thick, add water one tablespoon at a time.
- Taste and adjust seasoning — add more lemon juice for tang, garlic for kick, or olive oil for richness.
- Garnish with a drizzle of olive oil, paprika, or chopped parsley before serving.
Flavor Variations
- Roasted Red Pepper Hummus – adds sweetness and smoky flavor.
- Spicy Hummus – blend in chili flakes or sriracha.
- Herbed Hummus – mix fresh basil, cilantro, or dill for a fresh twist.
- Avocado Hummus – creamy, nutrient-packed upgrade with heart-healthy fats.
Pro Tips for the Perfect Snack
- Pre-cut your veggies and store them in airtight containers with a damp paper towel to keep them crisp.
- Use single-serving containers of hummus for portion control (great for meal prep).
- Swap chips or crackers for veggies to cut down on empty calories and boost nutrition.
- Pair with whole-grain pita bread if you want a more filling snack or light meal.
Best Time to Eat Hummus and Veggies:
- As a mid-afternoon snack to beat energy slumps.
- Before a workout for sustained energy.
- As a late-night bite — it’s filling but won’t overload you with calories.
This snack is proof that healthy eating doesn’t have to be boring. With hummus and veggies, you get a crunchy, creamy, flavorful snack that feels indulgent but works hard for your health goals.
17. Baked Tofu Cubes
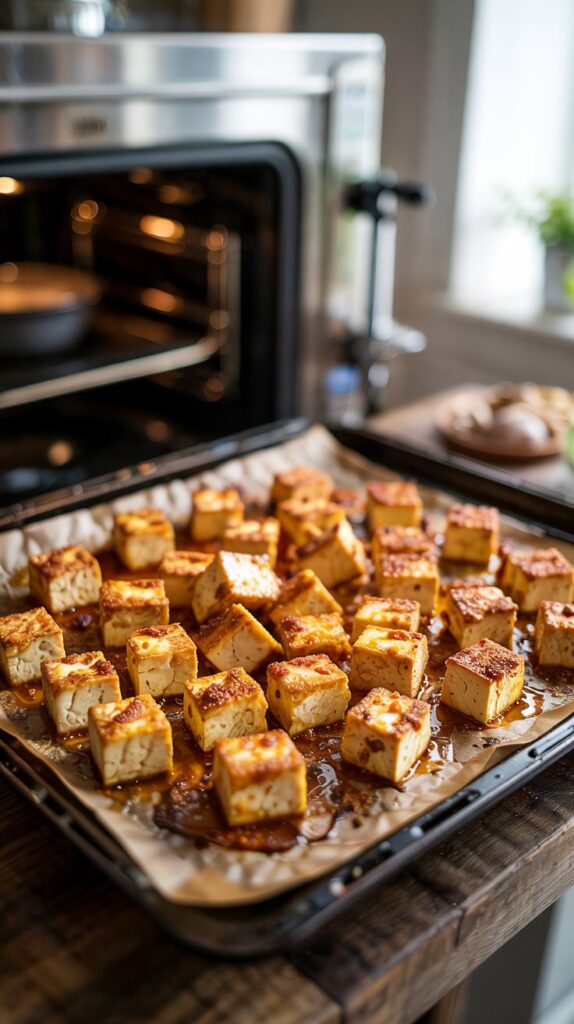
If you’re looking for a plant-based, protein-packed snack that’s versatile, filling, and easy to prep, baked tofu cubes are a winner.
Tofu is made from soybeans, which makes it a complete plant protein, meaning it contains all nine essential amino acids your body needs.
Baking tofu transforms its texture from soft and spongy to golden, slightly crispy on the outside, and chewy on the inside — making it perfect as a grab-and-go snack or an addition to salads, bowls, or wraps.
Unlike fried tofu, baking keeps it light while still locking in flavor.
The best part? You can season tofu cubes in endless ways — from savory garlic and soy marinades to spicy chili rubs or even smoky barbecue glazes.
This snack is not only high in protein but also rich in iron, calcium, and magnesium, making it ideal for anyone looking to fuel their body while keeping things clean and plant-friendly.
Nutritional Benefits
- High Protein Content: Tofu provides 8–10 grams of protein per 3-ounce serving.
- Plant-Based Power: A great alternative for those reducing or avoiding meat.
- Low in Calories: Baked tofu is nutrient-dense without excess fat.
- Rich in Minerals: Contains iron, calcium (especially if calcium-set), and magnesium to support bones and muscle function.
How to Make Baked Tofu Cubes at Home
Ingredients (serves 3–4):
- 1 block (14 oz) extra-firm tofu
- 2 tablespoons soy sauce or tamari (for gluten-free)
- 1 tablespoon olive oil or sesame oil
- 1 tablespoon cornstarch (for crispiness)
- 1 teaspoon garlic powder
- 1 teaspoon smoked paprika (optional, for depth)
- Pinch of black pepper
Steps:
- Press the tofu: Drain the tofu block and press it with paper towels or a tofu press for at least 15–20 minutes to remove excess water. This step ensures it bakes up firm and crisp.
- Cut into cubes: Slice tofu into bite-sized cubes.
- Marinate: In a bowl, toss cubes with soy sauce, oil, garlic powder, paprika, and pepper. For best flavor, marinate for 15–30 minutes.
- Coat with cornstarch: Sprinkle with cornstarch and toss gently — this creates that golden crispy coating.
- Bake: Preheat oven to 400°F (200°C). Spread tofu cubes evenly on a parchment-lined baking sheet. Bake for 25–30 minutes, flipping halfway, until golden and slightly crisp.
- Cool & enjoy: Let cool slightly before eating. The outside firms up as it cools.
Flavor Variations
- Spicy Chili Tofu: Add chili powder, sriracha, or cayenne for a kick.
- Asian-Inspired: Marinate with ginger, garlic, soy sauce, and sesame seeds.
- BBQ Tofu Bites: Toss cubes in your favorite barbecue sauce before baking.
- Herb & Lemon: Use lemon zest, thyme, and rosemary for a refreshing twist.
Ways to Enjoy Baked Tofu Cubes
- Eat plain as a protein snack on the go.
- Add to salads or Buddha bowls for extra protein.
- Pair with roasted veggies for a meal-prep lunch box.
- Toss into a wrap or pita with hummus and greens.
Pro Tips for Best Results
- Always press tofu before baking — excess water prevents crispiness.
- Don’t overcrowd the baking sheet; give each cube room to brown evenly.
- Store leftovers in the fridge for up to 4 days; reheat in the oven or air fryer for best texture.
- If you want ultra-crispy tofu, try tossing cubes in panko breadcrumbs before baking.
Best Time to Eat Baked Tofu Cubes:
- As a post-workout plant protein boost.
- Midday snack to fight cravings.
- Meal prep option for busy weeks.
Baked tofu cubes prove that healthy snacking doesn’t have to be boring. They’re crunchy, satisfying, and endlessly customizable while delivering a solid dose of protein.
Whether you’re plant-based or simply looking to switch things up from meat-based snacks, tofu cubes are a go-to option.
Pure Protein Variety Pack – 12 Count Box
18. Shrimp Cocktail
Shrimp cocktail isn’t just a party appetizer — it’s also one of the leanest, most protein-packed snacks you can add to your diet.
Shrimp are naturally low in calories yet loaded with high-quality protein, iodine, selenium, and omega-3 fatty acids.
When paired with a tangy cocktail sauce, you get a refreshing, satisfying snack that feels indulgent but is actually light and nutrient-dense.
The beauty of shrimp cocktail lies in its simplicity: shrimp can be boiled, steamed, or roasted in minutes, then chilled and served with a flavorful sauce.
It’s great for post-workout recovery, a midday protein boost, or even as a light lunch option when paired with veggies or a side salad.
Nutritional Benefits
- High-Quality Protein: About 18 grams of protein per 3-ounce serving.
- Low-Calorie: Shrimp are lean and naturally low in fat.
- Rich in Micronutrients: Provides iodine (for thyroid health), selenium (antioxidant support), and vitamin B12.
- Omega-3 Fatty Acids: Support brain and heart health.
How to Make Shrimp Cocktail at Home
Ingredients (serves 2–3):
- 1 pound large shrimp (peeled and deveined, tails on if preferred)
- 4 cups water
- 1 lemon (sliced)
- 2 garlic cloves (crushed)
- 1 teaspoon salt
- 1 teaspoon black peppercorns
Cocktail Sauce:
- ½ cup ketchup
- 2 tablespoons prepared horseradish (more for extra kick)
- 1 tablespoon lemon juice
- 1 teaspoon Worcestershire sauce
- Dash of hot sauce (optional)
Steps:
- Boil the shrimp: In a pot, bring water, lemon slices, garlic, salt, and peppercorns to a boil. Reduce to a simmer.
- Cook shrimp: Add shrimp and cook for 2–3 minutes, until pink and opaque. Don’t overcook, or they’ll turn rubbery.
- Chill: Immediately transfer shrimp to an ice bath to stop cooking and keep them firm. Chill for at least 15 minutes.
- Make the sauce: In a small bowl, whisk together ketchup, horseradish, lemon juice, Worcestershire sauce, and hot sauce.
- Serve: Arrange chilled shrimp on a platter with a bowl of cocktail sauce in the center.
Flavor Variations
- Spicy Cajun Shrimp Cocktail: Toss shrimp in Cajun seasoning before boiling.
- Garlic Butter Shrimp Cocktail: Roast shrimp with garlic and olive oil for extra richness.
- Asian-Inspired: Serve with soy sauce, wasabi, and lime juice instead of cocktail sauce.
Pro Tips
- Buy wild-caught shrimp when possible for better flavor and nutrition.
- Keep the tails on for easier dipping (plus better presentation).
- Prep in advance — shrimp cocktail holds up well in the fridge for up to 2 days.
- If you’re short on time, buy pre-cooked shrimp and just whip up the sauce.
Why Shrimp Cocktail Makes a Great Snack
- Portable & Meal-Prep Friendly: Make a batch and keep it in the fridge for quick protein.
- Versatile: Enjoy it solo, pair with whole-grain crackers, or add it to a salad.
- Light but Filling: Low in calories yet keeps you satisfied thanks to its protein punch.
Best Time to Eat Shrimp Cocktail:
- As a post-workout snack to refuel muscles.
- At parties or gatherings as a healthy alternative to fried appetizers.
- As a light, refreshing high-protein lunch or dinner starter.
Shrimp cocktail is proof that you can have a snack that feels fancy and indulgent, yet fully supports your health and fitness goals.
With its high protein content, low calories, and refreshing taste, it’s a must-add to your list of go-to high-protein snacks.
19. Skyr Yogurt
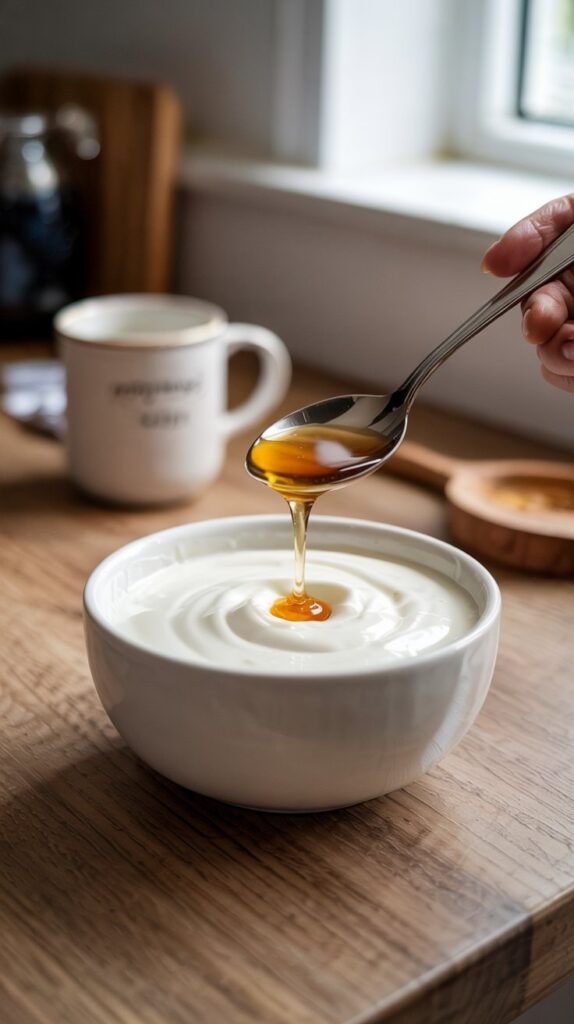
If you’re looking for a snack that’s rich in protein, creamy in texture, and versatile enough for both sweet and savory dishes, Skyr is a fantastic choice.
This traditional Icelandic dairy food has been enjoyed for centuries and is often compared to Greek yogurt—except it’s even thicker and higher in protein.
Not only does Skyr help support muscle growth, aid digestion, and keep you full for hours, but it’s also low in fat and naturally packed with probiotics.
While you can easily buy it in most grocery stores, making Skyr at home gives you a fresher, more authentic taste and allows you to control the ingredients.
How to Make Skyr Yogurt at Home
Ingredients:
- 1 gallon skim milk (whole milk can be used for a creamier version)
- 2–3 tablespoons plain Skyr (store-bought, with live cultures) or Greek yogurt as a starter
- 1/8 teaspoon liquid rennet (or 1/4 rennet tablet dissolved in 2 tbsp water)
- Cheesecloth or a clean kitchen towel
- Large pot and thermometer
Step-by-Step Instructions:
- Heat the Milk
- Pour the milk into a large pot and slowly heat it until it reaches 190°F (88°C). Stir occasionally to prevent it from burning at the bottom.
- Once it hits the temperature, remove it from heat and let it cool down to about 105°F (40°C).
- Add the Starter
- Stir in your Skyr starter (store-bought plain Skyr or Greek yogurt). This introduces the live cultures that ferment the milk.
- Add the Rennet
- Dilute the rennet in a little water and stir it into the milk mixture. Cover the pot and let it sit undisturbed at room temperature for 12–18 hours. The milk will thicken into a yogurt-like consistency.
- Strain the Skyr
- Once thickened, pour the mixture into a cheesecloth-lined strainer set over a large bowl.
- Let it drain for 4–6 hours (or longer if you want it extra thick). The liquid (whey) will separate, leaving you with thick, creamy Skyr.
- Chill and Serve
- Transfer your Skyr into an airtight container and refrigerate. It will stay fresh for about a week.
Serving Ideas
- Add berries, nuts, or honey for a quick sweet snack.
- Mix with herbs and spices for a savory dip or spread.
- Blend into smoothies for a thicker, protein-rich texture.
Making Skyr at home may take time, but the reward is a fresh, probiotic-rich superfood that you can flavor any way you like.
20. Homemade Protein Muffins
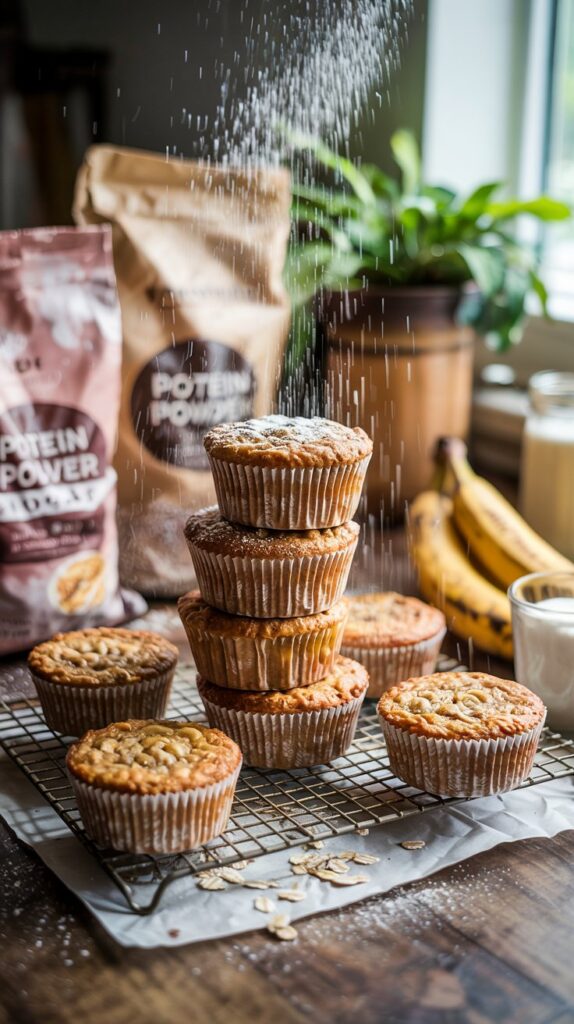
When you’re craving something baked and delicious but still want to stay on track with your health goals, protein muffins are the perfect answer.
Unlike traditional muffins that are loaded with refined flour and sugar, homemade protein muffins give you a balanced snack that’s high in protein, lower in empty carbs, and packed with flavor.
They’re a great grab-and-go option for busy mornings, pre-workout fuel, or even a guilt-free dessert.
The beauty of making them at home is that you control the ingredients—you can keep them wholesome, nutrient-dense, and free from unnecessary additives.
Why Protein Muffins Are a Healthy Snack Choice
- Boost Muscle Recovery: With a protein powder base, these muffins help repair and build muscle after workouts.
- Keeps You Full: Protein digests slowly, meaning you’ll feel satisfied longer compared to regular muffins.
- Customizable: You can add fruits, nuts, seeds, or spices to fit your taste and nutritional needs.
- Portable: Perfect for tossing in your gym bag, lunch box, or keeping in the freezer for busy days.
How to Make Protein Muffins at Home
Ingredients (Makes 10–12 muffins):
- 2 cups oat flour (or blended rolled oats)
- 1 scoop vanilla or chocolate protein powder
- 1 teaspoon baking powder
- 1 teaspoon cinnamon
- 2 ripe bananas (mashed)
- 2 large eggs (or flax eggs for vegan option)
- 1/2 cup Greek yogurt (or dairy-free yogurt)
- 1/4 cup honey or maple syrup
- 1 teaspoon vanilla extract
- Optional add-ins: blueberries, dark chocolate chips, walnuts, or chia seeds
Step-by-Step Instructions:
- Preheat the Oven
- Set your oven to 350°F (175°C) and line a muffin tin with paper liners or lightly grease it.
- Mix Dry Ingredients
- In a large bowl, combine oat flour, protein powder, baking powder, and cinnamon. Stir well.
- Prepare Wet Ingredients
- In another bowl, mash the bananas, then whisk in eggs, Greek yogurt, honey, and vanilla extract until smooth.
- Combine Mixtures
- Slowly fold the wet ingredients into the dry mixture. Mix gently until everything is just combined (don’t overmix).
- Add Extras
- Stir in blueberries, chocolate chips, or nuts if desired.
- Bake
- Scoop the batter evenly into the muffin tin and bake for 18–22 minutes, or until a toothpick inserted into the center comes out clean.
- Cool and Store
- Let the muffins cool before eating. Store them in an airtight container for up to 5 days, or freeze for up to 2 months.
Serving Ideas
- Enjoy warm with a smear of natural peanut butter for extra protein.
- Pair with a protein shake or coffee for a quick breakfast.
- Top with Greek yogurt and berries for a balanced snack.
Homemade protein muffins are proof that healthy eating doesn’t have to be boring. They’re sweet, satisfying, and give your body the fuel it needs—without the sugar crash of traditional muffins.
“Build Lean Muscle Faster – Try Nutricost Vanilla Whey Isolate Today! https://amzn.to/46uw5rd
Frequently Asked Questions (FAQs)
1. Are high-protein snacks necessary if I already eat enough protein at meals?
Not always. If your main meals already give you the protein your body needs, you may not need extra snacks.
However, high-protein snacks are useful between meals to keep energy steady, curb cravings, and support muscle recovery—especially if you work out regularly or have long gaps between meals.
2. What is the best time to eat a high-protein snack?
It depends on your goals.
- Pre-workout: Protein plus some carbs can give you fuel and prevent muscle breakdown.
- Post-workout: Protein helps muscles recover and grow.
- Between meals: Keeps you full, stabilizes blood sugar, and prevents overeating later.
There isn’t a “wrong” time—just listen to your body and fit snacks into your lifestyle.
3. Can I eat protein snacks every day?
Yes! In fact, making protein snacks part of your daily routine can support weight loss, muscle building, or simply healthy eating.
Just remember balance—snacks should complement your main meals, not replace them.
4. Are store-bought protein bars and snacks healthy?
Some are, but many aren’t. A lot of packaged protein snacks are loaded with sugar, artificial sweeteners, or low-quality ingredients.
Always read labels—look for clean protein sources, low sugar (under 8–10g), and at least 10–15g of protein per serving. Or, better yet, make your own at home so you know exactly what’s inside.
5. Can high-protein snacks help with weight loss?
Yes—protein is the most filling macronutrient. It helps reduce cravings, keeps you full longer, and prevents overeating.
When paired with fiber-rich foods (like veggies, nuts, or seeds), protein snacks can make weight loss easier and more sustainable.
6. How much protein should be in a snack?
A good rule of thumb: aim for 10–20 grams of protein in a snack.
This amount is enough to help keep you full, support your muscles, and balance blood sugar without overloading your daily intake.
7. Can vegetarians and vegans still enjoy high-protein snacks?
Absolutely. Great plant-based protein snacks include edamame, roasted chickpeas, chia pudding, baked tofu, nut butters, lentil soups, and vegan protein smoothies.
Plant-based protein powders are also an easy way to boost protein in recipes.
Final takeaway: Protein snacks aren’t just for bodybuilders—they’re for anyone who wants steady energy, better appetite control, and support for muscle and overall health.

Join the Healthy & Fit Lifestyle
Get weekly meal tips, healthy recipes, and transformation inspiration from BasedWorkouts — straight to your inbox!