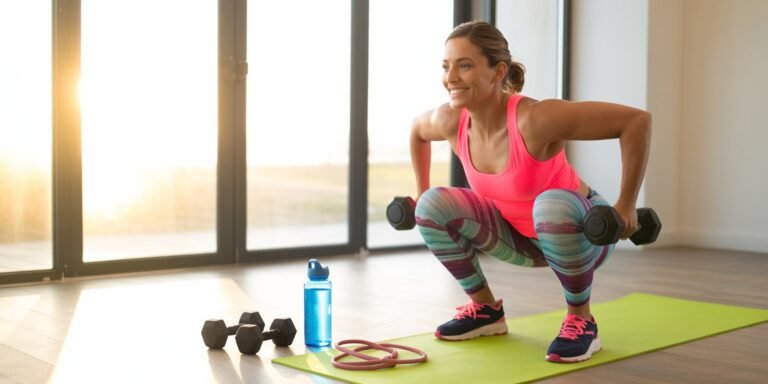
A strong, toned back isn’t just about looks — it’s key to better posture, reduced back pain, and overall functional strength in everyday life. But the good news? You don’t need a crowded gym or heavy machines to get results.
With the right exercises, women can effectively strengthen and sculpt their back from the comfort of home, using minimal equipment or even just their body weight.
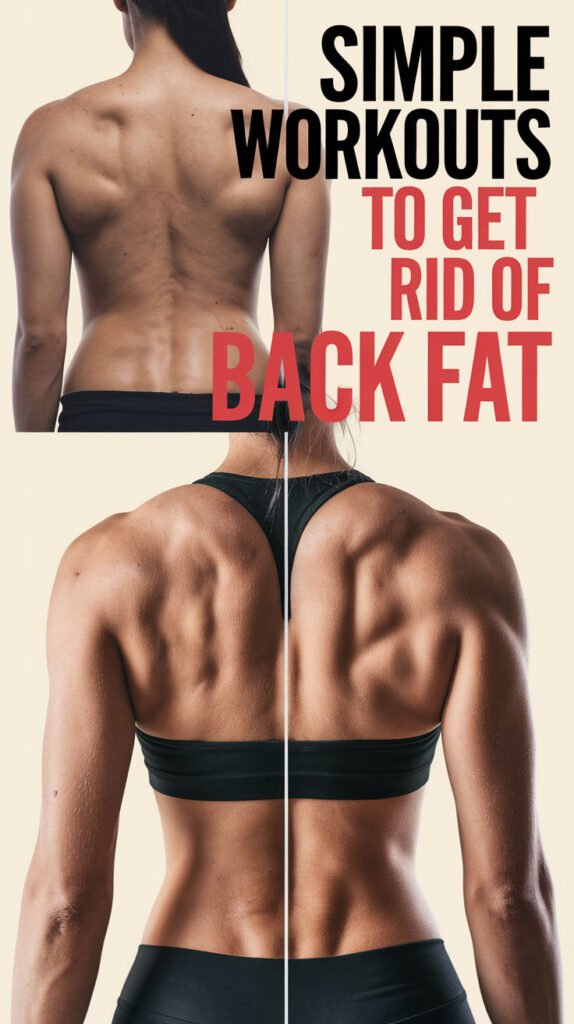
In this guide, we’ll walk you through the best back exercises for women that target all the major muscles — from your lats and traps to your rhomboids and lower back.
Each move is designed to improve posture, tone your back, and boost strength while being approachable for beginners and challenging enough for more experienced fitness enthusiasts.
By following this routine, you’ll not only see a leaner, stronger back but also feel more confident, energized, and capable in your daily activities.
Heads up! This post may contain affiliate links, which means we may earn a small commission if you make a purchase — at no extra cost to you. We only share workout gear and home fitness tools we truly believe can help women strengthen, tone, and feel amazing from the comfort of home.
Why Strengthen Your Back?
Strengthening your back is one of the most important yet often overlooked aspects of fitness.
A strong, well-conditioned back supports your spine, posture, and overall body function, and it plays a vital role in both athletic performance and everyday life.
Many people focus heavily on chest, arms, or legs while neglecting back muscles, which can lead to muscular imbalances, poor posture, chronic pain, and even injuries over time.
By prioritizing back strength, you not only improve aesthetics but also enhance mobility, stability, and overall health.
The Comprehensive Benefits of a Strong Back
- Improves Posture and Alignment:
Weak back muscles, especially in the upper and mid-back, contribute to slouching, rounded shoulders, and forward head posture. Strengthening these muscles helps you stand taller, move more efficiently, and reduce strain on your neck and shoulders. - Reduces Risk of Injury:
A strong back stabilizes the spine and supports the core, which is essential for lifting, bending, or twisting safely. Strengthening the back reduces the likelihood of strains, sprains, herniated discs, and chronic lower back pain. - Enhances Functional Strength for Daily Life:
Back muscles are involved in nearly every movement, from lifting groceries and carrying children to bending, twisting, or pushing and pulling objects. A stronger back makes these activities easier, safer, and more energy-efficient. - Boosts Athletic Performance:
Sports and physical activities like swimming, rowing, climbing, and weightlifting rely heavily on a strong back. A well-developed back improves pulling strength, rotational movements, and overall endurance, giving you a competitive edge and reducing the risk of overuse injuries. - Supports Balanced Physique and Muscle Symmetry:
Focusing on the back ensures that your upper body is proportionate and balanced, preventing muscular imbalances that can lead to poor posture and shoulder injuries. Strong, toned back muscles contribute to a visually appealing “V-shaped” upper body and overall aesthetics. - Enhances Core Stability and Strength:
Many back exercises engage the erector spinae, rhomboids, and posterior deltoids, which work together with your core muscles to stabilize your torso. A stable core improves balance, coordination, and performance in both weightlifting and functional movements, while also protecting your lower back from injury. - Improves Mobility and Flexibility:
Strengthening the back increases range of motion in the shoulders, spine, and hips, allowing for smoother movement and reduced stiffness. This is especially important as we age, helping maintain independence and an active lifestyle. - Promotes Better Circulation and Postural Endurance:
Regular back training improves blood flow to the upper body and spine, supporting recovery and reducing tension in muscles that often become tight from prolonged sitting. Over time, this increases your ability to maintain proper posture for longer periods without discomfort.
Key Back Muscles to Target
- Latissimus Dorsi (Lats): Large side muscles responsible for the “V-shape” and pulling movements.
- Trapezius (Traps): Upper back muscles that stabilize the shoulders and neck.
- Rhomboids: Located between the shoulder blades, essential for retracting and stabilizing the scapulae.
- Erector Spinae: Muscles along the spine that extend and stabilize your back.
- Posterior Deltoids: Rear shoulder muscles that assist with pulling and lifting exercises.
- Teres Major & Minor: Small muscles that help with rotation and shoulder stability.
Pro Tips for Back Strengthening:
- Train your back 2–3 times per week with a combination of compound and isolation exercises.
- Prioritize full range of motion for each exercise to maximize muscle activation.
- Incorporate both heavy, low-rep strength training and lighter, high-rep endurance work to build muscle and improve circulation.
- Pair back training with stretching and mobility exercises to maintain flexibility and prevent tightness.
- Focus on mind-muscle connection during each movement to ensure proper activation of the target muscles.
Key Takeaway: Strengthening your back is more than just building muscles—it’s about enhancing posture, stability, mobility, and overall health.
A strong back supports daily activities, reduces injury risk, improves athletic performance, and contributes to a balanced, aesthetically pleasing physique.
Consistent, targeted back training is essential for anyone looking to improve their fitness, function, and long-term well-being.
10 Best Back Exercises for Women at Home
Building a strong, toned back at home doesn’t require a gym full of equipment. With bodyweight moves, dumbbells, or resistance bands, you can strengthen your lats, traps, rhomboids, and posterior deltoids while improving posture, mobility, and overall strength. Here are 10 of the most effective back exercises women can do at home, complete with step-by-step instructions.
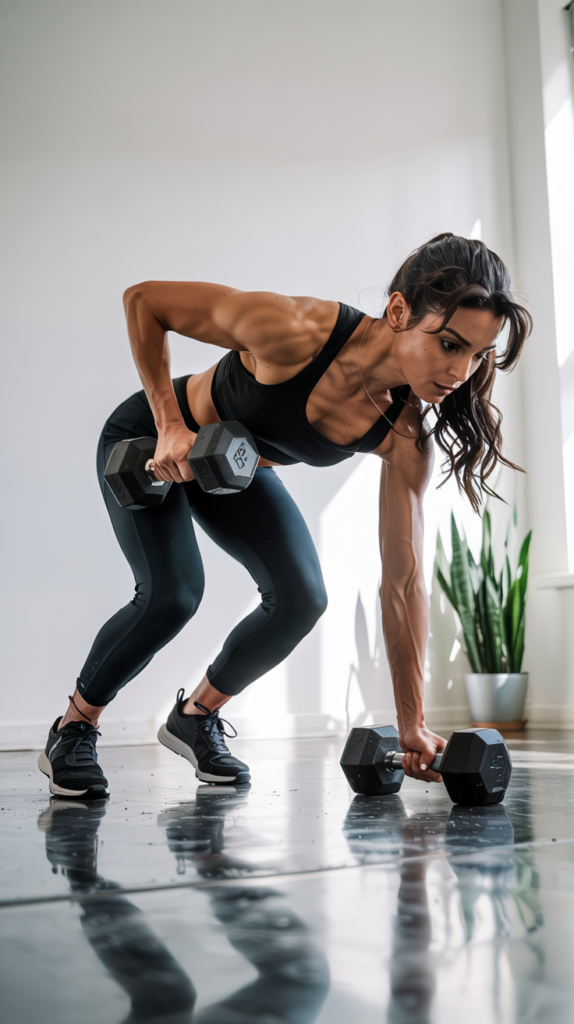
1️⃣ Bent-Over Dumbbell Rows (Targets: Lats, Rhomboids, Traps)
How to Do It:
- Hold a dumbbell in each hand, palms facing your body.
- Hinge forward at the hips until your torso is almost parallel to the floor. Keep your back flat and core engaged.
- Pull the dumbbells toward your ribcage, squeezing your shoulder blades together.
- Lower the weights slowly and repeat for 10–15 reps.
Tip: Avoid rounding your back; focus on controlled movement and squeezing your upper back muscles.
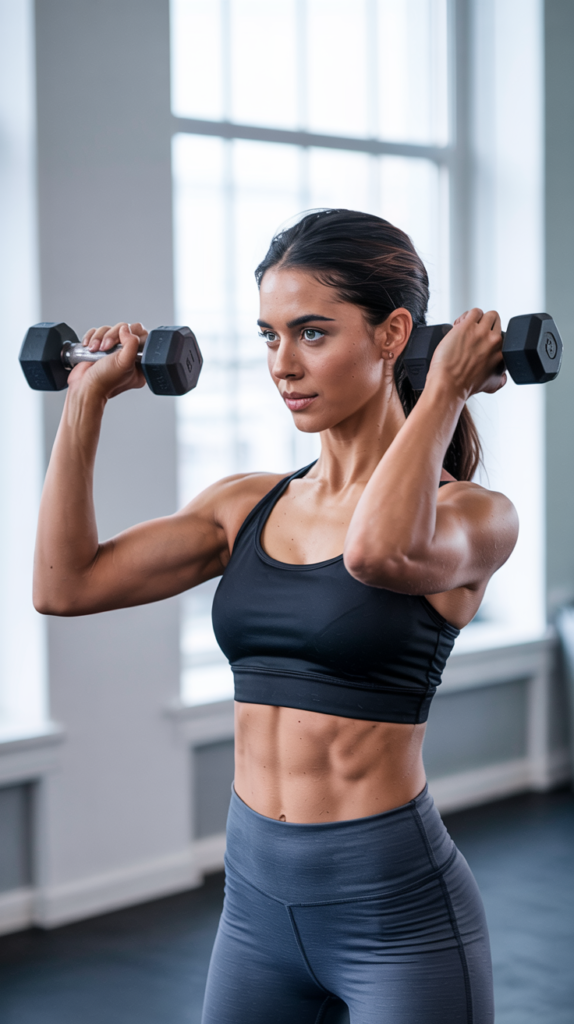
2️⃣ Reverse Flys (Targets: Rear Delts, Traps, Rhomboids)
How to Do It:
- Hold a dumbbell in each hand and hinge slightly at the hips.
- Keep a slight bend in your elbows.
- Raise your arms out to the sides until they are parallel to the floor.
- Lower slowly and repeat for 12–15 reps.
Tip: Move slowly to maintain tension in your upper back rather than using momentum.
3️⃣ Superman (Targets: Erector Spinae, Glutes, Lats)
How to Do It:
- Lie face down on a mat with arms extended in front of you.
- Lift your arms, chest, and legs off the floor simultaneously.
- Hold for 2–3 seconds, then lower slowly.
- Repeat for 12–15 reps.
Tip: Focus on lifting from your back and glutes rather than straining your neck.
4️⃣ Plank with Shoulder Blade Squeeze (Targets: Traps, Rhomboids, Core)
How to Do It:
- Start in a forearm plank position with your body in a straight line.
- Squeeze your shoulder blades together without dropping your hips.
- Hold for 5–10 seconds, release, and repeat for 8–12 reps.
Tip: Keep your core tight to protect your lower back.
5️⃣ Resistance Band Pull-Aparts (Targets: Rear Delts, Traps, Rhomboids)
How to Do It:
- Hold a resistance band in front of you at chest height with both hands.
- Pull the band apart, moving your hands outward until arms are fully extended to the sides.
- Slowly return to start and repeat for 12–15 reps.
Tip: Keep shoulders down and back, don’t shrug during the movement.
6️⃣ Single-Arm Dumbbell Rows (Targets: Lats, Rhomboids, Traps)
How to Do It:
- Place your right knee and hand on a bench or sturdy surface.
- Hold a dumbbell in your left hand, arm extended toward the floor.
- Row the dumbbell toward your ribcage, squeezing your shoulder blade.
- Lower slowly and repeat 10–12 reps per side.
Tip: Avoid twisting your torso; keep movement controlled
7️⃣ Cat-Cow Stretch with Row (Targets: Spinal Mobility, Upper Back)
How to Do It:
- Start in a tabletop position on hands and knees.
- As you move into “cow” (arching back), pull your elbows toward your torso in a row motion.
- Exhale into “cat” (rounding back) and repeat for 10–12 reps.
Tip: This combination builds mobility while lightly engaging the back muscles.
8️⃣ Bird-Dog (Targets: Erector Spinae, Glutes, Core)
How to Do It:
- Begin in a tabletop position with hands under shoulders and knees under hips.
- Extend your right arm forward and left leg back, keeping hips square.
- Hold for 2–3 seconds, then return to start. Repeat 10–12 reps per side.
Tip: Keep movements slow and controlled to engage the core and back effectively.
9️⃣ Wall Angels (Targets: Traps, Rhomboids, Shoulders)
How to Do It:
- Stand with your back against a wall, feet a few inches away.
- Press your lower back and shoulders into the wall.
- Slowly raise your arms overhead and back down, like making a snow angel.
- Repeat 12–15 times.
Tip: Focus on maintaining contact with the wall throughout the movement.
🔟 Glute Bridges with Back Squeeze (Targets: Glutes, Lower Back, Lats)
How to Do It:
- Lie on your back with knees bent, feet flat on the floor.
- Lift your hips into a bridge position while squeezing your shoulder blades and glutes.
- Lower slowly and repeat for 12–15 reps.
Tip: Pause at the top and actively engage your back muscles to maximize tension.
Key Takeaways:
Pair these exercises with stretching and mobility work to maintain flexibility and prevent tightness.
Performing 2–3 back-focused sessions per week at home can improve posture, tone muscles, and prevent injury.
Combining bodyweight, dumbbells, and resistance bands ensures a balanced approach targeting all major back muscles.
Focus on controlled movements, proper form, and mind-muscle connection for maximum effectiveness.
1. Superman Hold
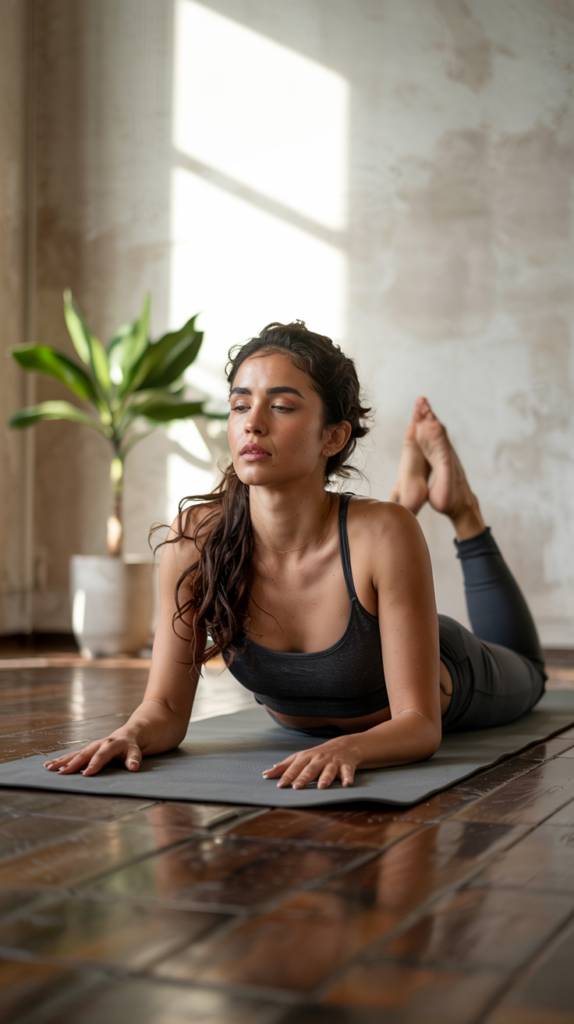
The Superman Hold is a foundational bodyweight exercise designed to strengthen your entire posterior chain, including the lower back, glutes, and shoulders.
Often overlooked in home workouts, this move is critical for improving posture, spinal stability, and functional strength.
For women, it’s particularly beneficial because it tones the back and glutes without heavy weights, reduces the risk of lower back pain, and complements other bodyweight or resistance exercises.
How to Do the Superman Hold
- Start Position:
Lie face down on a mat with your legs fully extended and arms stretched out overhead, palms facing down. Keep your neck neutral by looking slightly ahead or at the floor to avoid neck strain. Engage your core muscles and keep your spine long. - Lift & Engage:
Simultaneously lift your arms, chest, and legs a few inches off the ground. Focus on engaging your erector spinae (lower back muscles), glutes, and shoulder stabilizers rather than using momentum. - Hold & Squeeze:
Hold this lifted position for 15–30 seconds, actively squeezing your glutes and pulling your shoulder blades together. Feel the stretch and activation along your entire back. - Lower Slowly:
Gently return your arms, chest, and legs to the floor, maintaining control throughout the movement. Avoid dropping too quickly to maximize engagement and prevent strain.
Reps & Sets
- Beginner: 2–3 sets of 10–12 reps, holding each rep for 15 seconds.
- Intermediate: 3–4 sets of 12–15 reps, holding each for 20–30 seconds.
- Advanced: 4 sets of 15 reps, holding each for 30–45 seconds or adding light ankle/wrist weights to increase resistance.
Benefits of the Superman Hold
- Strengthens the Entire Posterior Chain:
Engages lower back, glutes, and upper back muscles, which are critical for posture and overall functional strength. - Improves Posture:
Strengthening the back muscles helps counteract slouching, rounded shoulders, and the forward head posture caused by prolonged sitting. - Enhances Core Stability:
While primarily a back exercise, the Superman Hold activates the core muscles, providing better spinal support during everyday activities and workouts. - Reduces Risk of Injury:
A stronger posterior chain protects the spine during lifting, bending, and twisting motions, decreasing the risk of strains or injuries. - Boosts Glute Activation:
Glutes play a key role in lower body power, balance, and fat loss. The Superman Hold helps tone and strengthen glutes, improving the overall shape of the lower body. - Accessible for All Levels:
This exercise requires no equipment and can be modified for beginners by lifting only arms or legs at a time. Advanced users can add resistance bands or small weights.
Tips for Maximum Effectiveness
- Move slowly and deliberately to maintain tension in the back muscles.
- Keep your core engaged to protect the lower spine.
- Breathe steadily: exhale as you lift, inhale as you lower.
- Avoid lifting too high if it causes discomfort; focus on muscle activation over height.
- For variety, you can alternate lifting opposite arm and leg (bird-dog style) while holding a brief lift for added coordination and stability.
Key Takeaway: The Superman Hold is a simple yet powerful exercise that strengthens the back, glutes, and shoulders, improves posture, and enhances overall functional strength.
Incorporating this move into your home workout routine helps prevent back pain, build a toned posterior chain, and support better daily movement patterns.
2. Bird Dog
The Bird Dog is a bodyweight exercise that strengthens the entire posterior chain while improving core stability, balance, and coordination.
It’s particularly effective for women looking to tone their back and glutes, reduce lower back pain, and enhance overall functional strength.
Unlike some heavy lifting exercises, the Bird Dog is gentle on the joints, making it ideal for beginners and those working out at home.
How to Do the Bird Dog
- Start Position:
Begin on all fours with your hands directly under your shoulders and knees under your hips. Keep your spine neutral, core engaged, and neck aligned with your back. - Extend Opposite Limbs:
Slowly extend your right arm forward and left leg back, keeping them parallel to the floor. Engage your glutes, back, and core to maintain stability. - Pause & Squeeze:
Hold this extended position for 2–3 seconds, squeezing your glutes and drawing your shoulder blades slightly together. Focus on maintaining a straight line from fingertips to toes. - Return & Switch:
Slowly bring your arm and leg back to the starting position. Repeat on the opposite side (left arm, right leg).
Reps & Sets
- Beginner: 2–3 sets of 8–10 reps per side, holding each rep for 2–3 seconds.
- Intermediate: 3 sets of 10–12 reps per side, holding each rep for 3–5 seconds.
- Advanced: 3–4 sets of 12–15 reps per side, holding each for 5–8 seconds. Add ankle or wrist weights for extra resistance.
Benefits of the Bird Dog
- Strengthens the Core and Lower Back:
By engaging the erector spinae and abdominal muscles, the Bird Dog stabilizes the spine and reduces the risk of lower back injuries. - Tones Glutes and Shoulders:
The extension movement targets glute muscles and shoulder stabilizers, helping lift and shape the buttocks while strengthening the upper back. - Enhances Balance and Coordination:
The unilateral nature of the exercise improves neuromuscular coordination, promoting better balance and control during daily activities and workouts. - Improves Posture:
Regular practice strengthens the muscles that support proper spinal alignment, reducing slouching and promoting a tall, upright posture. - Gentle on Joints:
No heavy equipment or high-impact movements are required, making this exercise safe for beginners, older adults, or those recovering from minor injuries. - Promotes Mind-Muscle Connection:
The Bird Dog encourages focused engagement of each muscle group, teaching better body awareness and control during other exercises.
Tips for Maximum Effectiveness
- Move slowly and deliberately, avoiding momentum.
- Keep your core tight throughout the movement to protect the spine.
- Exhale while extending your arm and leg; inhale as you return to start.
- Maintain a neutral spine—avoid sagging your lower back or arching excessively.
- Focus on quality over quantity; a controlled rep is more effective than rushing through multiple reps.
Key Takeaway: The Bird Dog is a highly effective, low-impact exercise that strengthens the back, glutes, and core, while improving posture, balance, and coordination. Including it in your home workout routine enhances spinal stability and overall functional fitness, making daily movements easier and reducing the risk of injury.
3. Reverse Snow Angels
Reverse Snow Angels are a fantastic bodyweight exercise for the upper back, focusing on the trapezius, rhomboids, and rear deltoids.
This move helps improve posture, strengthen the upper back, and counteract rounded shoulders—a common issue for people who sit at desks or spend hours on devices.
Unlike traditional weightlifting, Reverse Snow Angels require minimal equipment, making them perfect for home workouts.
How to Do Reverse Snow Angels
- Start Position:
Lie face down on a mat with your legs straight and arms by your sides, palms facing down. Keep your neck neutral by looking at the floor to avoid straining. - Lift & Engage:
Gently lift your chest and arms a few inches off the ground, engaging your upper back and shoulder muscles. Your glutes and core should also be slightly engaged to support the spine. - Perform the Angel Motion:
Slowly move your arms out to the sides and up toward your head, mimicking a “snow angel” motion. Keep arms straight but not locked at the elbows. - Return to Start:
Reverse the motion, bringing your arms back to your sides while maintaining engagement in your back muscles.
Reps & Sets
- Beginner: 2–3 sets of 10–12 reps, moving slowly and focusing on form.
- Intermediate: 3–4 sets of 12–15 reps, pausing briefly at the top of the movement for added tension.
- Advanced: 4 sets of 15–20 reps, optionally holding small light dumbbells to increase resistance.
Benefits of Reverse Snow Angels
- Strengthens Upper Back Muscles:
Targets the trapezius, rhomboids, and rear deltoids, improving pulling strength and overall upper body stability. - Improves Posture:
Helps correct rounded shoulders and forward head posture, common in desk workers or anyone who spends long hours sitting. - Engages Core and Glutes:
While primarily an upper back exercise, maintaining a lifted position activates the core and glutes, enhancing overall stability. - Low-Impact and Safe:
Reverse Snow Angels are gentle on joints and ideal for beginners or those recovering from shoulder or upper back issues. - Promotes Mind-Muscle Connection:
The slow, controlled motion encourages focus on the muscles being worked, ensuring proper activation and reducing compensatory movements.
Tips for Maximum Effectiveness
- Move slowly and deliberately to maintain tension in the upper back muscles.
- Avoid shrugging your shoulders—keep them down and back throughout the motion.
- Keep your neck neutral; do not lift the head excessively.
- Focus on quality over quantity; a controlled rep is far more effective than rushing.
- For added intensity, use light dumbbells or resistance bands, but only if you can maintain proper form.
Key Takeaway: Reverse Snow Angels are a highly effective, low-equipment exercise that strengthens the upper back, improves posture, and enhances shoulder stability
Incorporating them into your home routine can counteract slouching, reduce upper back tension, and create a balanced, toned physique.
4. Wall Angels
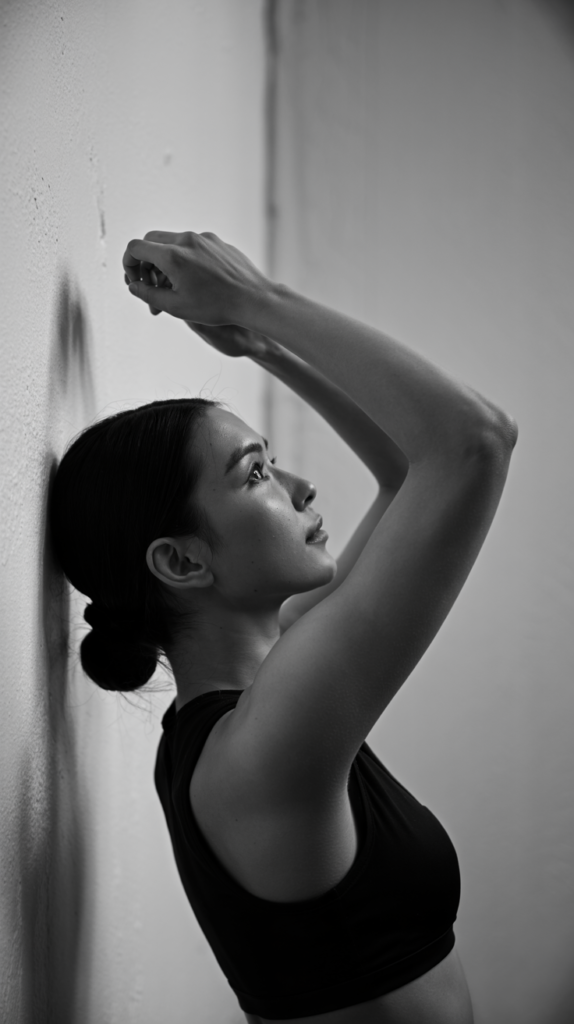
Wall Angels are an excellent posture-correcting exercise that targets the upper back and shoulder muscles, including the trapezius, rhomboids, and rear deltoids.
This move is perfect for women who spend long hours sitting at a desk or using electronic devices, as it helps counteract rounded shoulders, improve shoulder mobility, and strengthen the muscles that support proper posture.
Wall Angels require minimal space and no equipment, making them ideal for home workouts.
How to Do Wall Angels
- Start Position:
Stand with your back against a wall, feet a few inches away from it. Press your lower back, upper back, and shoulders firmly against the wall. Keep your neck neutral and chin slightly tucked. - Position Your Arms:
Bend your elbows to 90 degrees so your arms form a “goalpost” shape. Try to keep your forearms and hands touching the wall as much as possible. - Perform the Angel Motion:
Slowly slide your arms upward over your head in a “snow angel” motion while maintaining contact with the wall. Go as high as you can without losing contact or arching your lower back. - Return to Start:
Slowly lower your arms back to the starting position, keeping your back and shoulders pressed against the wall.
Reps & Sets
- Beginner: 2–3 sets of 8–10 reps, focusing on controlled movement and maintaining wall contact.
- Intermediate: 3 sets of 10–12 reps, holding briefly at the top for 2–3 seconds to increase activation.
- Advanced: 3–4 sets of 12–15 reps, optionally using a light resistance band around the arms for added intensity.
Benefits of Wall Angels
- Corrects Rounded Shoulders:
Strengthens the muscles of the upper back, pulling the shoulders back and counteracting slouching caused by prolonged sitting. - Improves Shoulder Mobility:
The controlled overhead motion helps increase range of motion in the shoulder joints, reducing stiffness and improving flexibility. - Engages Upper Back Muscles:
Targets the trapezius, rhomboids, and rear delts, helping to build a stronger, more toned upper back. - Promotes Postural Awareness:
Performing Wall Angels teaches mindful positioning of the spine and shoulders, encouraging better posture throughout the day. - Low-Impact & Safe:
This exercise is gentle on the shoulders and spine, making it suitable for beginners, desk workers, or those recovering from minor shoulder issues.
Tips for Maximum Effectiveness
- Keep your core engaged to avoid arching your lower back.
- Move slowly and deliberately to maintain tension in the upper back.
- Ensure your forearms and hands stay as close to the wall as possible.
- Focus on the mind-muscle connection, feeling the engagement in your traps, rhomboids, and rear delts.
- Incorporate into your routine 2–3 times per week for posture improvement and upper back strengthening.
Key Takeaway: Wall Angels are a simple yet powerful exercise for strengthening the upper back, improving shoulder mobility, and correcting poor posture.
Regularly including Wall Angels in your home workout routine can reduce tension, enhance shoulder stability, and promote a more upright, confident posture.
5. Bent-Over Rows (with Dumbbells or Resistance Band)
Bent-Over Rows are a classic back-strengthening exercise that effectively targets the lats, rhomboids, trapezius, and rear deltoids.
This move is highly versatile, as it can be performed with dumbbells, resistance bands, or even household items if you’re training at home.
Bent-Over Rows are ideal for women looking to tone their back, improve posture, and build functional upper-body strength.
How to Do Bent-Over Rows
- Start Position:
Hold a dumbbell in each hand with palms facing your torso, or grab a resistance band with both hands. Stand with feet shoulder-width apart, knees slightly bent. - Hinge at the Hips:
Push your hips back and lean your torso forward until it’s nearly parallel to the floor. Keep your back flat, chest lifted, and core engaged. Avoid rounding your lower back. - Row the Weights/Band:
Pull the dumbbells or resistance band toward your ribcage, keeping elbows close to your body. Squeeze your shoulder blades together at the top of the movement. - Lower Slowly:
Slowly lower the weights or release tension on the band, returning to the start position. Maintain control throughout the movement.
Reps & Sets
- Beginner: 2–3 sets of 10–12 reps, focusing on proper form and controlled movement.
- Intermediate: 3–4 sets of 12–15 reps, pausing briefly at the top for maximum contraction.
- Advanced: 4 sets of 12–15 reps, using heavier dumbbells or a stronger resistance band for increased intensity.
Benefits of Bent-Over Rows
- Strengthens the Upper and Middle Back:
Activates the lats, rhomboids, traps, and rear delts, helping sculpt a toned and strong back. - Improves Posture:
Strengthening the upper back muscles counteracts slouching and rounded shoulders, promoting better posture. - Enhances Pulling Strength:
Improves your ability to perform functional movements like lifting, carrying, and pulling in daily life. - Supports Core Stability:
Engaging your core to maintain a flat back strengthens the abdominal and lower back muscles, enhancing overall stability. - Versatile & Accessible:
Can be performed with dumbbells, resistance bands, or household items, making it perfect for home workouts.
Tips for Maximum Effectiveness
- Keep your spine neutral throughout the exercise—avoid rounding or arching your back.
- Focus on a slow, controlled movement to maximize muscle engagement.
- Pull with your elbows, not your hands, to properly engage the back muscles.
- Breathe out while pulling and inhale while lowering the weights.
- Start with lighter weights or a less resistant band until you master proper form.
Key Takeaway: Bent-Over Rows are a must-do exercise for a strong, toned, and functional back.
Incorporating them into your home or gym routine helps build upper and middle back strength, improve posture, and enhance overall upper-body performance.
6. Reverse Flys (Dumbbells or Resistance Band)
Reverse Flys are a fantastic isolation exercise for the upper back and shoulders, specifically targeting the rear deltoids, trapezius, and rhomboids.
This exercise is essential for women looking to improve posture, reduce shoulder rounding, and tone the upper back. It can be done using dumbbells or a resistance band, making it a versatile option for home workouts.
How to Do Reverse Flys
- Start Position:
Hold a dumbbell in each hand with palms facing each other, or secure a resistance band under your feet. Stand with feet hip-width apart, knees slightly bent, and hinge forward at the hips until your torso is nearly parallel to the floor. Keep your back flat and core engaged. - Arm Position:
Let your arms hang straight down from your shoulders, maintaining a slight bend in the elbows. This is your starting position. - Lift & Squeeze:
Slowly raise your arms out to the sides until they are parallel to the floor, keeping elbows slightly bent. Focus on squeezing your shoulder blades together at the top of the movement. - Lower Slowly:
Gradually bring your arms back to the starting position with control, maintaining tension in your upper back muscles throughout.
Reps & Sets
- Beginner: 2–3 sets of 10–12 reps, focusing on controlled movement.
- Intermediate: 3–4 sets of 12–15 reps, pausing briefly at the top to maximize contraction.
- Advanced: 4 sets of 12–15 reps with slightly heavier dumbbells or a stronger resistance band.
Benefits of Reverse Flys
- Strengthens the Upper Back:
Engages the trapezius, rhomboids, and rear deltoids, helping to tone and define the upper back. - Improves Posture:
Strengthening the muscles responsible for scapular retraction helps counteract slouching and forward-leaning shoulders. - Enhances Shoulder Stability:
By targeting the rear delts, Reverse Flys improve shoulder balance, which supports all pressing and pulling movements. - Low-Impact & Safe:
Ideal for home workouts, this exercise is gentle on the shoulders while still effectively isolating upper-back muscles. - Supports Functional Strength:
Helps with pulling, lifting, and carrying motions, making daily tasks easier and safer.
Tips for Maximum Effectiveness
- Keep your core tight and back flat to avoid rounding the spine.
- Move slowly and deliberately, avoiding momentum.
- Focus on pulling with your back muscles, not your arms, for proper activation.
- Keep a slight bend in the elbows to reduce strain on the joints.
- Breathe out while lifting and inhale while lowering the weights.
Key Takeaway: Reverse Flys are a highly effective upper-back isolation exercise that strengthens, tones, and stabilizes the rear delts, traps, and rhomboids.
Including them in your home or gym routine improves posture, shoulder stability, and overall upper-back definition.
7. Deadlifts (with Dumbbells)
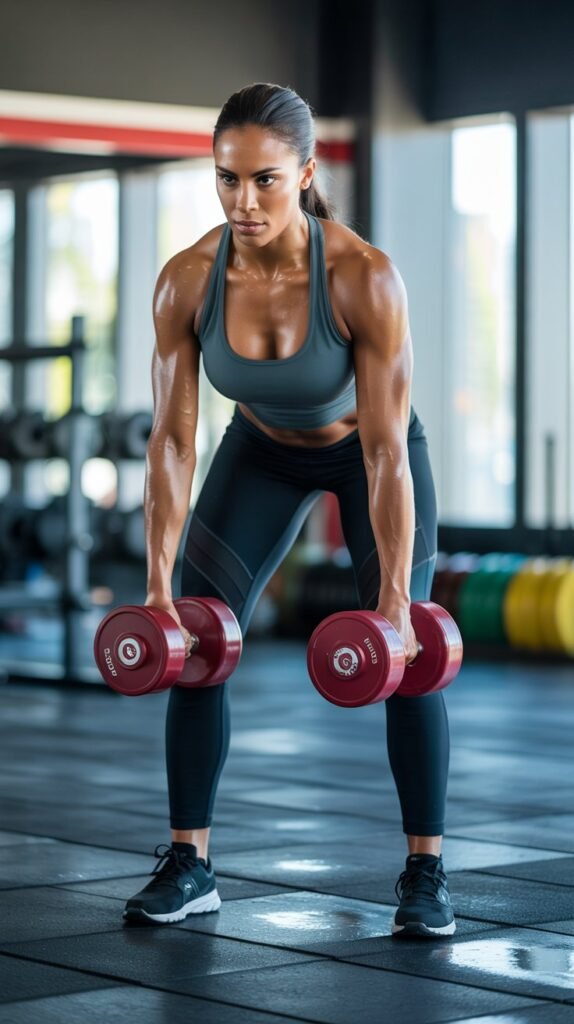
Deadlifts are one of the most effective full-body exercises you can do, especially for strengthening the posterior chain, which includes your hamstrings, glutes, lower back, and traps.
Performing them with dumbbells makes them accessible for home workouts while still providing excellent strength and muscle-building benefits.
For women, deadlifts help tone the legs and glutes, improve posture, and enhance functional strength for everyday activities like lifting, bending, and carrying objects.
How to Do Dumbbell Deadlifts
- Start Position:
Stand with feet hip-width apart, holding a dumbbell in each hand in front of your thighs with palms facing your body. Keep your shoulders back, chest lifted, and core engaged. - Hinge at the Hips:
Push your hips back and slowly lower the dumbbells toward the ground. Keep the dumbbells close to your legs as you descend. Slightly bend your knees, but the movement should focus on the hip hinge, not squatting. - Engage the Posterior Chain:
Keep your back flat, shoulders pulled back, and core tight. Feel the stretch in your hamstrings and the engagement in your glutes and lower back. - Lift Back Up:
Drive through your heels and push your hips forward to return to standing. Squeeze your glutes at the top while keeping your chest lifted.
Reps & Sets
- Beginner: 2–3 sets of 8–10 reps with light dumbbells to master form.
- Intermediate: 3–4 sets of 10–12 reps with moderate weight.
- Advanced: 4 sets of 10–12 reps with heavier dumbbells, maintaining strict form to avoid injury.
Benefits of Dumbbell Deadlifts
- Full-Body Strength:
Deadlifts engage multiple muscle groups simultaneously, providing a time-efficient strength-building workout. - Builds Strong Glutes & Hamstrings:
The hip hinge motion targets glutes and hamstrings, helping lift and shape the lower body. - Strengthens the Lower Back:
Engages the erector spinae to improve posture, spinal stability, and reduce the risk of lower back injuries. - Improves Functional Movement:
Strengthens muscles used in daily activities such as lifting, bending, and carrying, enhancing overall fitness and mobility. - Enhances Core Stability:
Keeping the core engaged during the lift improves abdominal and oblique strength, supporting balance and spinal alignment. - Minimal Equipment Needed:
Can be done at home with just a pair of dumbbells, making it accessible for any fitness level.
Tips for Maximum Effectiveness
- Focus on the hip hinge, not squatting. Hips go back, not down.
- Keep the dumbbells close to your legs throughout the movement.
- Maintain a flat back and engaged core to prevent lower back strain.
- Breathe in as you lower the dumbbells, exhale while lifting.
- Start with lighter weights to perfect form before progressing to heavier dumbbells.
Key Takeaway: Dumbbell Deadlifts are a powerful compound exercise that strengthens the posterior chain, tones glutes and hamstrings, improves posture, and enhances functional strength.
Adding them to your back and leg routine is essential for a balanced, strong, and toned physique.
8. Bridge Pose
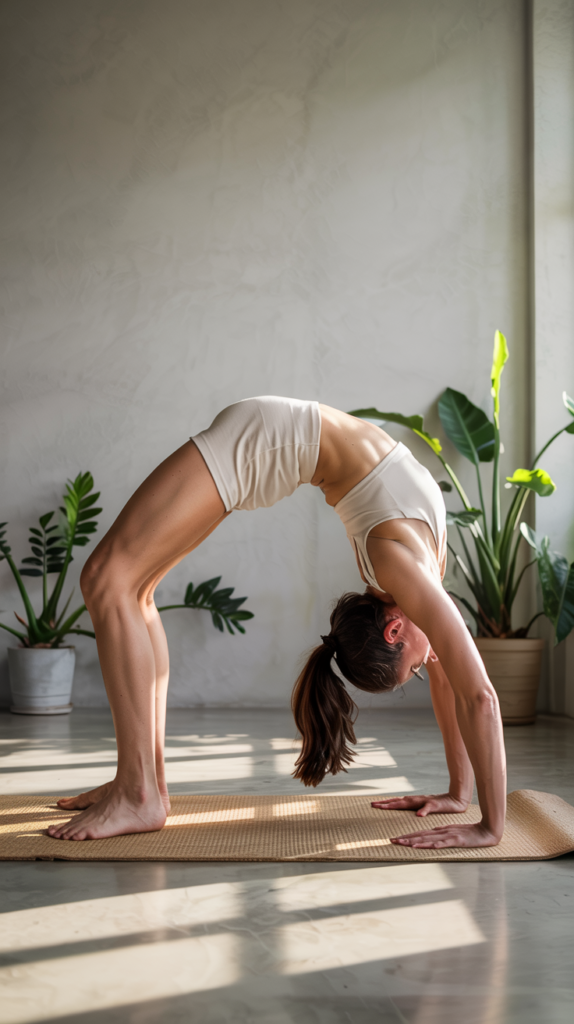
The Bridge Pose is a bodyweight exercise that strengthens the glutes, hamstrings, lower back, and core while also improving spinal flexibility and hip mobility.
This move is particularly beneficial for women who want to tone the glutes, support the lower back, and improve posture.
It’s simple to perform at home and can be easily modified or progressed to add intensity.
How to Do the Bridge Pose
- Start Position:
Lie on your back with knees bent and feet flat on the floor, hip-width apart. Place your arms at your sides with palms facing down. Keep your feet close enough to your glutes so that your fingertips can just touch your heels. - Lift Your Hips:
Press through your heels and lift your hips toward the ceiling, engaging your glutes and core. Your body should form a straight line from shoulders to knees. - Hold & Squeeze:
Pause at the top for 3–5 seconds, squeezing your glutes and keeping your core tight. Focus on lifting with the glutes rather than the lower back. - Lower Slowly:
Gently lower your hips back to the starting position, maintaining control throughout the movement.
Reps & Sets
- Beginner: 2–3 sets of 10–12 reps, holding the top for 3 seconds.
- Intermediate: 3–4 sets of 12–15 reps, holding the top for 5–7 seconds.
- Advanced: 4 sets of 15–20 reps, adding a resistance band around the knees or a dumbbell on the hips for added challenge.
Benefits of the Bridge Pose
- Strengthens Glutes & Hamstrings:
Engages the posterior chain, toning the glutes and strengthening hamstrings for better lower body shape and function. - Supports Lower Back Health:
Strengthening the glutes and core helps alleviate lower back tension and supports spinal alignment. - Improves Core Stability:
Activating the core during the lift enhances abdominal and pelvic stability, reducing the risk of injury during other exercises. - Increases Hip Mobility:
Lifting the hips promotes hip flexor stretching and mobility, which is crucial for posture and functional movement. - Enhances Functional Strength:
Strengthens muscles used in standing, bending, lifting, and walking, improving overall daily movement efficiency.
Tips for Maximum Effectiveness
- Focus on lifting with your glutes, not your lower back.
- Keep your knees aligned with your hips to avoid strain.
- Engage your core throughout to support the spine.
- Exhale as you lift and inhale as you lower.
- For more intensity, try single-leg bridges or add light weights on the hips.
Key Takeaway: The Bridge Pose is a simple yet powerful exercise that strengthens the glutes, hamstrings, core, and lower back while improving hip mobility.
Including it in your home workout routine helps enhance posture, reduce back pain, and tone the lower body effectively.
9. Plank to Row
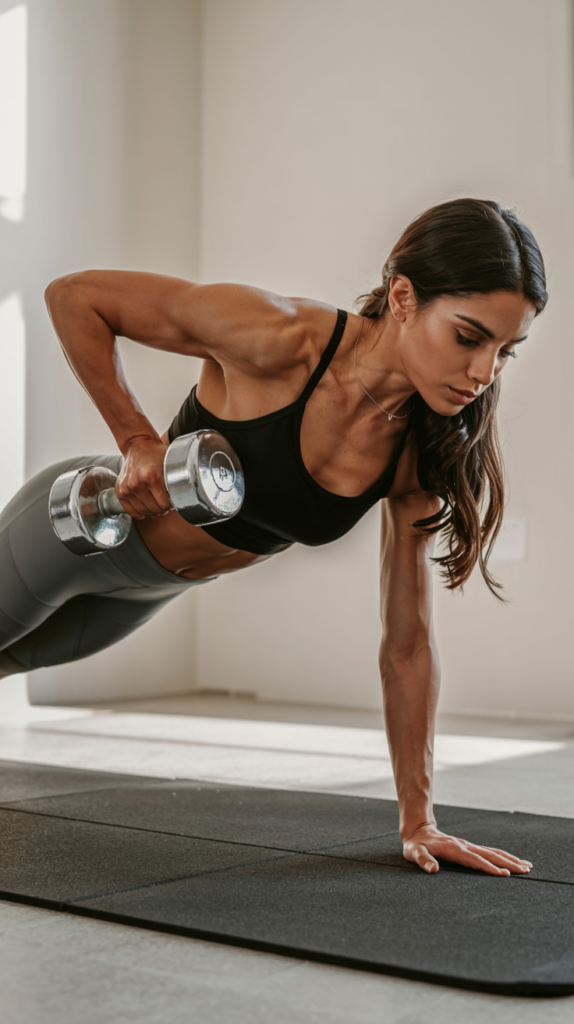
The Plank to Row is a dynamic, full-body exercise that combines core stabilization with upper-back strengthening.
By adding a rowing motion while holding a plank, you engage the lats, traps, rhomboids, shoulders, glutes, and core simultaneously, making it a powerful move for women looking to tone the back, improve posture, and build functional strength.
This exercise can be done with dumbbells or even just bodyweight if needed.
How to Do Plank to Row
- Start Position:
Begin in a high plank position with hands gripping dumbbells directly under your shoulders and feet hip-width apart. Keep your body in a straight line from head to heels, engaging your core and glutes. - Row One Side:
Shift your weight slightly to your left hand and row the right dumbbell toward your ribcage, keeping your elbow close to your torso. Focus on squeezing your shoulder blade at the top of the movement. - Lower & Switch:
Slowly lower the dumbbell back to the floor, maintaining a stable plank. Repeat the row on the left side. - Maintain Form:
Avoid rotating your hips or sagging your lower back. Keep your core tight and body aligned throughout the movement.
Reps & Sets
- Beginner: 2–3 sets of 6–8 reps per side, focusing on control and stability.
- Intermediate: 3 sets of 8–10 reps per side, holding the plank tighter and rowing with slow, controlled motion.
- Advanced: 3–4 sets of 10–12 reps per side, optionally using heavier dumbbells or a narrower plank stance for increased difficulty.
Benefits of Plank to Row
- Strengthens Upper Back & Shoulders:
The rowing motion targets the lats, traps, rhomboids, and rear delts, improving upper-body strength and posture. - Engages Core & Glutes:
Holding a plank activates the abdominal and glute muscles, enhancing stability and overall strength. - Promotes Functional Strength:
Improves strength for daily lifting, pulling, and stabilizing movements, making it a practical functional exercise. - Enhances Postural Awareness:
Strengthening the upper back and core helps counteract slouching and forward shoulders, promoting better posture. - Low-Impact Yet Challenging:
Despite being joint-friendly, the exercise challenges multiple muscle groups simultaneously, making it efficient for home or gym workouts.
Tips for Maximum Effectiveness
- Keep your core tight and avoid hip rotation while rowing.
- Exhale as you row the dumbbell; inhale as you lower it.
- Move slowly and deliberately to maximize muscle engagement.
- If needed, widen your feet for better stability during the plank.
- Focus on quality over quantity—controlled reps are more effective than fast, sloppy movements.
Key Takeaway: The Plank to Row is a powerful, multi-muscle exercise that strengthens the upper back, core, and glutes while improving posture and functional strength.
Adding it to your back workout routine ensures full-body engagement and effective toning at home or in the gym.
10. Seated Rows (with Resistance Band)
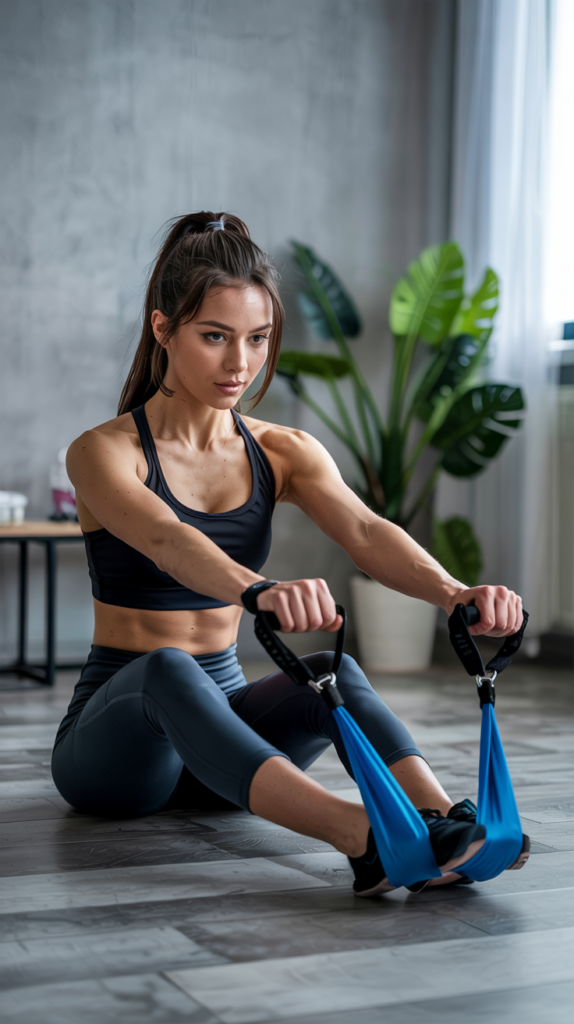
Seated Rows with a resistance band are a fantastic upper-back exercise that targets the lats, rhomboids, traps, and rear deltoids.
This move is perfect for women who want to strengthen and tone the back at home without heavy gym equipment.
Seated Rows also help improve posture, stabilize the shoulders, and build functional pulling strength, making them ideal for daily activities and overall upper-body fitness.
How to Do Seated Rows
- Start Position:
Sit on the floor with your legs extended straight in front of you. Wrap a resistance band around your feet, holding one end in each hand. Keep your back straight, chest lifted, and core engaged. - Row the Band:
Pull the band toward your torso, driving your elbows back and close to your sides. Focus on squeezing your shoulder blades together at the end of the motion. - Return Slowly:
Extend your arms slowly back to the starting position, keeping tension on the band throughout. Avoid rounding your shoulders or slouching. - Breathing:
Exhale as you pull the band, inhale as you return to the start.
Reps & Sets
- Beginner: 2–3 sets of 10–12 reps, focusing on form and controlled movement.
- Intermediate: 3 sets of 12–15 reps, pausing for 1–2 seconds at the squeeze.
- Advanced: 4 sets of 15–20 reps, using a stronger band or slower tempo for added intensity.
Benefits of Seated Rows
- Strengthens Upper Back Muscles:
Targets the lats, rhomboids, traps, and rear delts, promoting a toned and strong back. - Improves Posture:
Strengthening these muscles helps counteract rounded shoulders and slouching, particularly for desk workers. - Enhances Shoulder Stability:
Engages stabilizing muscles, supporting safer pressing and pulling movements. - Functional Strength:
Mimics daily pulling motions, improving strength for lifting, carrying, and general functional tasks. - Low-Impact & Accessible:
Requires minimal equipment and is gentle on joints, making it perfect for home workouts or beginners.
Tips for Maximum Effectiveness
- Keep your core tight and back straight to avoid slouching.
- Focus on pulling with your back muscles, not just your arms.
- Move slowly and deliberately to maintain tension on the muscles.
- Avoid shrugging your shoulders during the row; keep them down and back.
- Use a stronger band or increase reps as you progress for added challenge.
Key Takeaway: Seated Rows with a resistance band are a highly effective, low-equipment exercise that strengthens the upper back, improves posture, and builds functional pulling strength.
Incorporating them into your home workout routine helps create a balanced, strong, and toned upper body.
Tips for a Strong & Toned Back
Building a strong and toned back isn’t just about doing exercises—it’s also about consistency, proper form, and complementary habits that maximize results.
Whether you’re working out at home or in the gym, following these tips will help you strengthen muscles, improve posture, and sculpt a lean, defined back.
1. Prioritize Form Over Weight
Using heavier weights can be tempting, but correct form is essential to effectively target back muscles and prevent injury.
Focus on controlled movements, full range of motion, and proper posture rather than lifting as much as possible.
2. Incorporate Compound & Isolation Exercises
Combine compound exercises like deadlifts, bent-over rows, and pull-ups (which work multiple muscle groups) with isolation moves such as reverse flys and wall angels (which target specific back muscles).
This balance helps build strength while toning smaller muscles for definition.
3. Engage Your Core
A strong back is supported by a strong core. Tightening your abs and glutes during back exercises stabilizes your spine, improves posture, and increases the effectiveness of each movement.
4. Don’t Neglect Posture & Mobility Work
Including posture-correcting exercises like wall angels, superman holds, and cat-cow stretches improves spinal alignment and reduces tension from sitting or hunching.
Mobility work also ensures your muscles move efficiently, preventing stiffness and improving range of motion.
5. Progressive Overload
Gradually increase the resistance, repetitions, or sets over time. Progressive overload challenges your muscles and stimulates growth and strength gains, helping you avoid plateaus.
6. Include Both Strength & Endurance Training
Mix heavier weight, lower-rep sets to build strength with lighter weight, higher-rep sets for endurance. This combination helps sculpt a toned back while improving muscular stamina.
7. Maintain a Balanced Routine
Work all areas of your back—upper, middle, and lower—to avoid imbalances. Neglecting one area can lead to poor posture, uneven strength, or aesthetic gaps.
8. Stretch & Recover
Stretching after back workouts reduces tightness and improves flexibility, while adequate rest allows muscles to repair and grow stronger.
Incorporate foam rolling, yoga stretches, or gentle mobility work on off days.
9. Fuel Your Muscles
A strong back needs proper nutrition. Consume enough protein to support muscle repair and growth, along with complex carbs and healthy fats for energy and recovery. Hydration also plays a key role in muscle function and recovery.
10. Be Consistent & Patient
Strengthening your back is a gradual process. Stick to a consistent workout routine, track progress, and give your muscles time to adapt. Results will come with persistence and patience.
Key Takeaway: A strong, toned back comes from smart training, proper nutrition, mobility work, and consistency.
By combining the right exercises with good habits and recovery practices, you’ll improve posture, enhance performance, and achieve a sculpted, functional upper body.
FAQ: Back Exercises for Women at Home
Here are some common questions and answers to help women get the most out of their at-home back workouts.
1. How often should I work out my back at home?
For beginners, 2–3 times per week is ideal to allow muscles to recover. Intermediate and advanced trainees can increase to 3–4 times per week, ensuring rest days between intense sessions to prevent overtraining.
2. Do I need equipment to strengthen my back at home?
No, not necessarily. Many exercises like superman holds, bridge pose, wall angels, and planks use just your body weight. Dumbbells, resistance bands, or household items can enhance strength and provide progressive overload.
3. How long before I see results in my back?
With consistent workouts, proper form, and a balanced diet, noticeable strength and toning improvements can appear in 4–6 weeks. Muscle definition may take slightly longer, depending on body fat percentage and intensity.
4. Can back exercises help improve posture?
Yes! Strengthening the upper, middle, and lower back muscles supports spinal alignment and reduces shoulder rounding. Exercises like reverse flys, bent-over rows, and wall angels are particularly effective for posture.
5. Are these exercises safe for beginners?
Yes, all exercises can be modified for beginners. Focus on proper form, slower tempo, and lighter resistance. Avoid exercises that cause pain, and consider starting with bodyweight versions before adding weights.
6. How do I avoid lower back pain while doing these exercises?
- Keep your core engaged and back neutral.
- Avoid over-arching or rounding the spine.
- Use proper form and controlled movements.
- Start with lighter weights or bodyweight exercises until your strength improves.
7. Can I target my lower back separately?
Yes. Exercises like superman holds, bridges, and bird dogs specifically strengthen the lower back and support the entire posterior chain. Incorporate them into your routine 2–3 times per week.
8. Should I combine back exercises with other workouts?
Absolutely! Combining back exercises with core, glutes, and full-body strength training enhances overall posture, strength, and functional fitness. Cardio and flexibility work can also complement your back routine.
9. How can I make bodyweight back exercises more challenging?
- Add resistance bands or dumbbells.
- Increase reps, sets, or hold times.
- Slow down the tempo to maximize muscle engagement.
- Try advanced variations like single-leg bridges, plank-to-row, or superman pulses.
Key Takeaway:
At-home back exercises are effective, versatile, and safe for women of all fitness levels. With consistent practice, proper form, and gradual progression, you can strengthen your back, improve posture, and achieve a toned, functional upper body.
Final Thoughts
Strengthening your back at home is not only about aesthetics—it’s about building a functional, strong, and healthy body.
A well-toned back improves posture, reduces the risk of injury, enhances daily movements, and supports overall strength.
By incorporating the 10 best back exercises—including moves like superman holds, plank-to-rows, reverse flys, and seated rows—you target every major muscle group in the back: the lats, traps, rhomboids, rear delts, glutes, and lower back.
Combining these exercises with proper form, core engagement, and progressive overload ensures maximum results.
Don’t forget that consistency, recovery, and proper nutrition are equally important.
Strengthening your back gradually while maintaining a balanced lifestyle will yield long-lasting results, helping you feel stronger, more confident, and more capable in your daily life.
Whether you’re a beginner or an advanced trainee, these exercises can be adapted to your level and performed with minimal equipment at home.
Start incorporating them today to build a back that’s not only strong and toned but also resilient and functional.
Key Takeaway: A strong, well-conditioned back is foundational for strength, posture, and overall fitness.
By following a structured routine, paying attention to form, and progressing gradually, you can achieve a healthy, toned, and powerful back from the comfort of your home.